Audi Q5: Overview - Hood
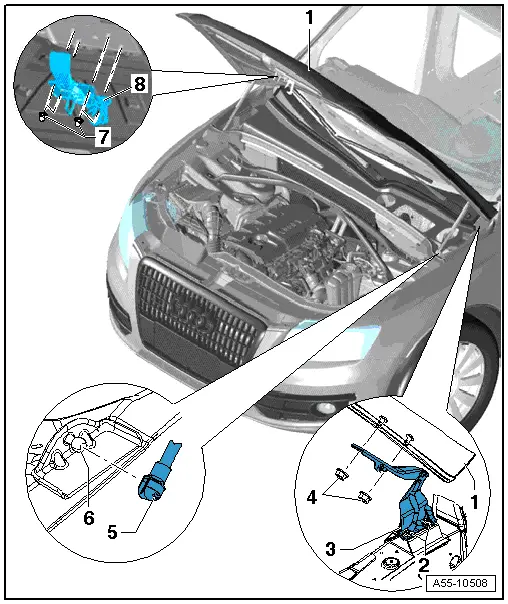
1 - Hood
- A second technician is needed to support and hold the hood during removal and installation.
- Removing:
- Remove the gas-filled strut from the hood. Refer to → Chapter "Overview - Gas-Filled Strut".
- Remove the nuts -4- from the upper hood hinge.
- Remove the hood.
- Install in reverse order of removal.
- Adjusting:
- Center the hood between the fenders.
- Adjust the height of the hood over the lower part of the hood lock.
- Adjust the gap between the hood and the fenders using the stop buffers.
2 - Bolts
- 21 Nm
3 - Hood Hinge
- For removal and installation, the hood must be removed or supported securely.
- Removing:
- Install the gas-filled strut. Refer to → Chapter "Overview - Gas-Filled Strut".
- Remove the bolts -2- and nuts -4-.
- Install in reverse order of removal.
4 - Nuts
- 21 Nm
5 - Gas-Filled Strut
- Removing and installing. Refer to → Chapter "Overview - Gas-Filled Strut".
- Install with tube end of strut at body.
6 - Ball Pin
- 21 Nm
7 - Nuts
- 8 Nm
8 - Hook
Overview - Hood Latch
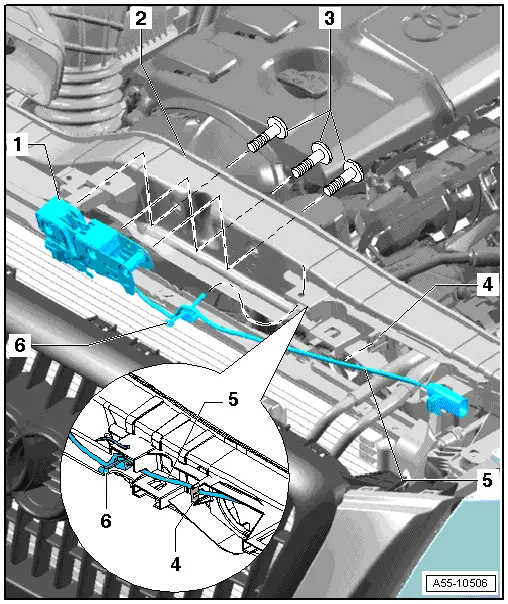
1 - Hood Latch
- Loosen the upper bumper cover and push it aside.
- Disconnect the lid lock cable at the coupling.
- Disconnect the connector.
- Remove the bolts -1 and 2-.
 Note
Note
To adjust the hood height, move the hood lock up or down as required.
2 - Lock Carrier
3 - Bolt
- 15 Nm
4 - Clamp
- Install the cable and electric wire into the tab on the lock carrier and close the clip.
5 - Lid Lock Wire
6 - Cable Tie
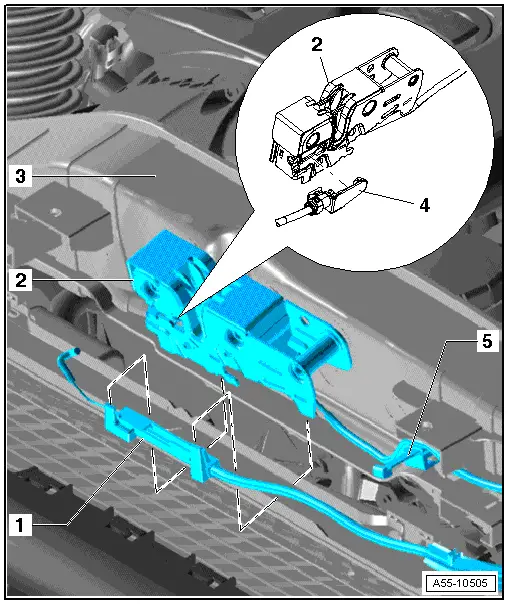
Overview - Release Cable
Release Cable
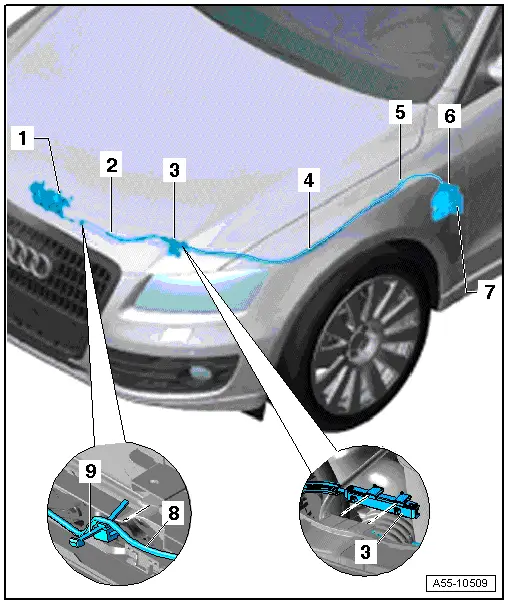
1 - Hood Latch
- Removing and Installing.
- To adjust hood, slide up or down.
2 - Hood Cable
- Removing:
- Disconnect the release cable at the coupling.
- Disengage the release cable from the bracket -7-.
- Pull the release cable through to the engine compartment.
- Installing: install in reverse order of removal
3 - Cable Coupling
- Slide the coupling clamp sideways onto the bracket -8- on the lock carrier.
- Disconnect the release cable here before removing the lock carrier and release lever.
4 - Hood Lock Rear Cable
- Release cable to the operating lever in the vehicle interior.
5 - Grommet
- Make sure it fits correctly when installing.
6 - Release Lever
- Disengage the release cable.
7 - Hood Lock Release Lever
- Operating lever cover, removing.
8 - Wire
- Pull the electrical wire and the lid lock cable through the lock carrier as shown.
9 - Cable Tie
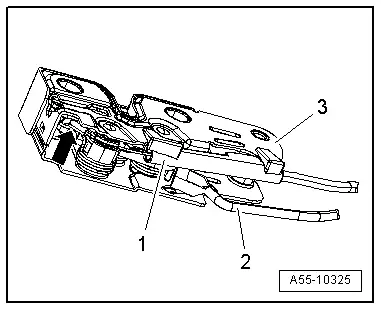
Cable Coupling
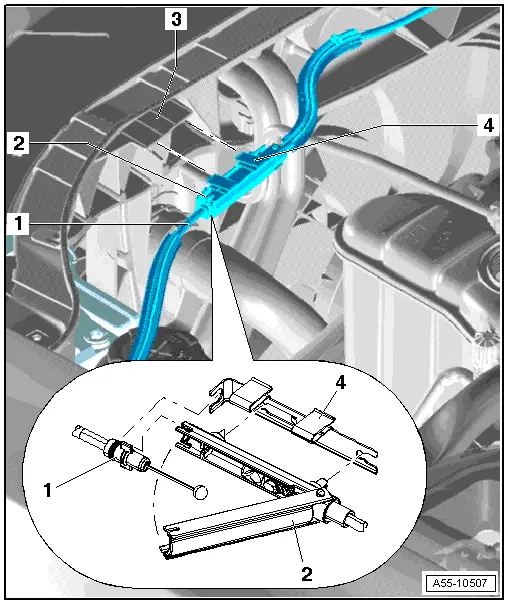
1 - Rear Cable
- Cable to the operating lever
- When removing, pull back out of the coupling.
2 - Front Cable with Coupling
- To release, remove the clamp from the lock carrier and pull the cable back slightly out of the clamp.
- Fold the coupling up and lift the front cable with the nipple out of the coupling.
3 - Lock Carrier
4 - Clamp
- Slide sideways onto the lock carrier after installing the cable.
Cable, Attaching in Hood Lock
1 - Front Release Cable
- Insert the cable nipple in the operating lever in the hood lock.
- Install the cable and guide onto the hood lock from underneath.
2 - Hood Latch
- Engage the release cable guide in the lower part of the hood lock.
3 - Lock Carrier
4 - Release Cable
- Only for RHD
5 - Cable Tie
- Secure the wire and cable to the lock carrier with a cable tie.
Release Cable, Engaging in Hood Lock
 Caution
Malfunction
The nipple must not be twisted when engaged in the hood lock. Otherwise, the tension can cause it to disengage and it will not be possible to release the hood any more using the release cable.
- Insert the release cable nipple -2- in the operating lever -arrow- in the hood lock -3-.
- Engage the release cable with guide -1- in the hood lock from below.
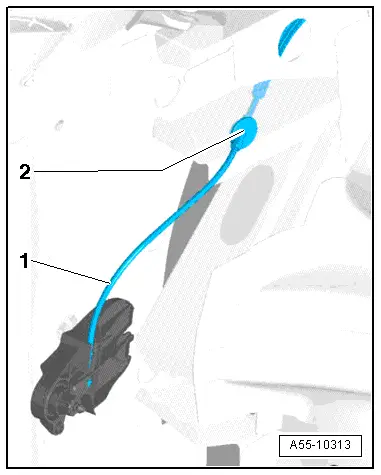
Routing the Release Cable inside the Passenger Compartment
- Route the release cable -1- along the "A-pillar" as illustrated.
- Install the grommet -2- all the way onto the "A-pillar" from the interior.
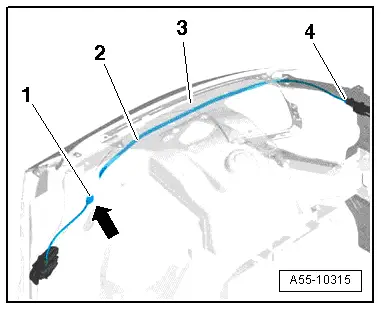
Routing the Release Cable inside the Engine Compartment
- Starting from the interior, route the release cable -2- forward toward the lock carrier in the fender mounting flange -3- as illustrated.
- Push the coupling -4- onto the lock carrier.
Overview - Gas-Filled Strut
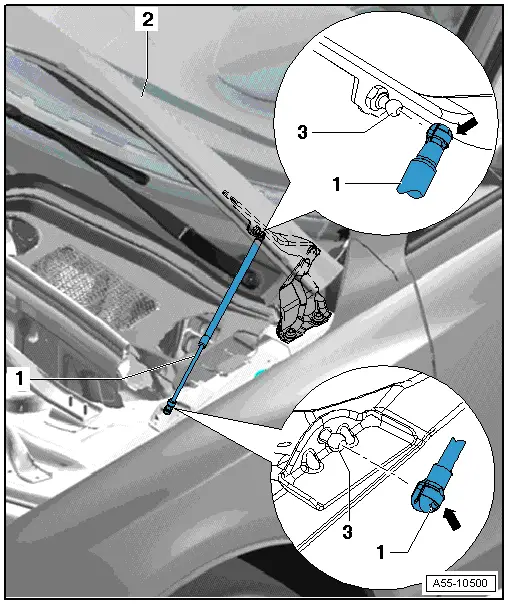
1 - Gas-Filled Strut
- To remove securing spring -arrow-, raise slightly and remove gas-filled strut from ball stud.
 Note
Note
Ensure position is correct when installing: gas-filled strut tube must be engaged on hood side.
2 - Hood
3 - Ball Pin
- On the hood side 21 Nm
Overview - Hood Seals
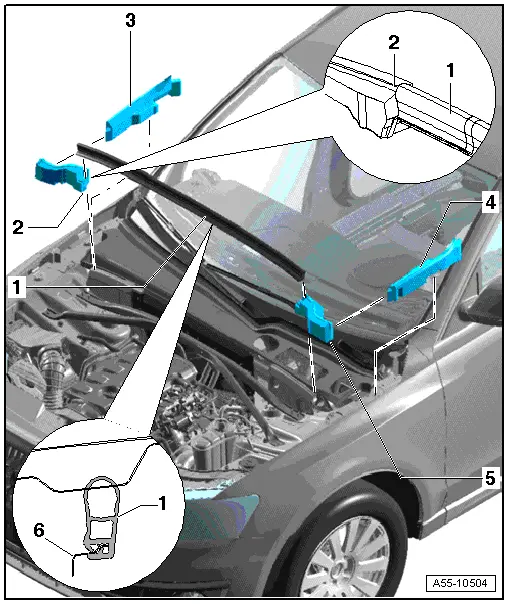
1 - Gasket for Plenum Chamber
- To remove, pull back from the body flange at the sides.
- When installing, slide it into the sealing profile with pre-tension beginning at the sides.
- Press seal onto opposite side in stages.
- Slide seal into sealing profile on opposite side.
- Compress the excess length along the plenum chamber bulkhead.
2 - Right Sealing Profile
- To remove, unclip from the body and remove it sideways under the fender flange.
- When installing, the clips on the foam piece must engage in the body.
3 - Right Gasket
- Unclip from the fender mounting flange upward.
4 - Left Sealing Profile
- To remove, unclip from the body and remove it sideways under the fender flange.
- When installing, the clips on the foam piece must engage in the body.
5 - Left Gasket
- Unclip from the fender mounting flange upward.
6 - Plenum Chamber Bulkhead
- Slide the plenum chamber seal on at the sides.

