Audi Q5: Hood, Adjusting
Special tools and workshop equipment required
- Gauge - Gap Adjustment -3371-
Hood Gap Dimensions
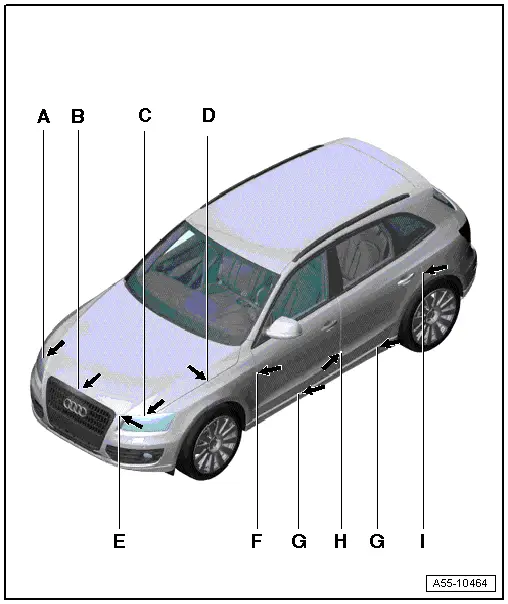
- Dimension -A- = 5.0 mm
- Dimension -B- = 4.5 mm
- Dimension -C-= 5.0 mm
- Dimension -D- = 3.0 mm
- Dimension -E- = 4.5 mm
Height Adjustment Stop Buffer
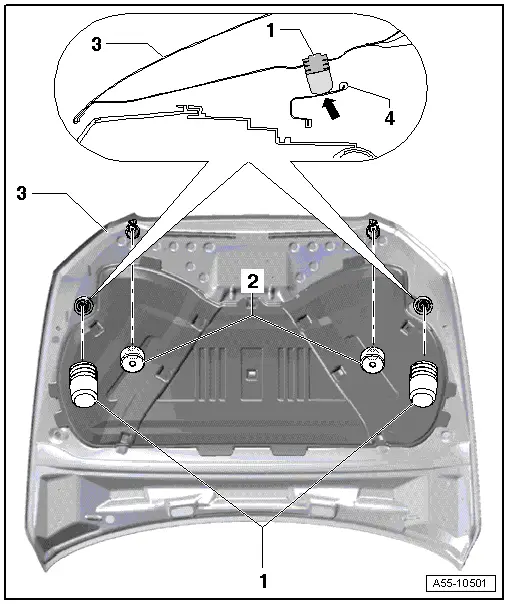
1 - Adjusting Buffer
- Use for adjusting the height on the front side.
- The adjusting buffer -2- must lightly contact the lock carrier when the hood is closed.
2 - Spacer
- The rubber buffers -1- function as a strike guard must not contact the lock carrier when the hood is closed.
3 - Hood
4 - Lock Carrier
Hood Release Lever, Removing and Installing
Release Lever Cover, Removing
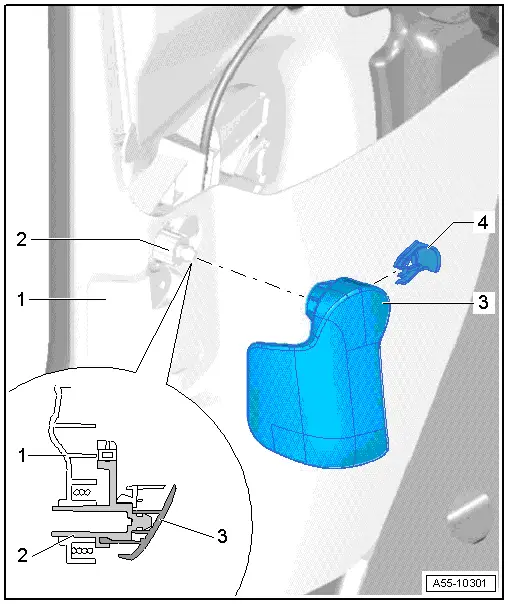
1 - "A-Pillar" Lower Trim
2 - Hood Release Lever Cover
- First disengage the cable from the coupling inside the engine compartment.
- Pry the clip out of the hood release lever.
- Remove the cover sideways from the operating lever.
3 - Release Lever
4 - Clip
- Press in completely, it must engage.
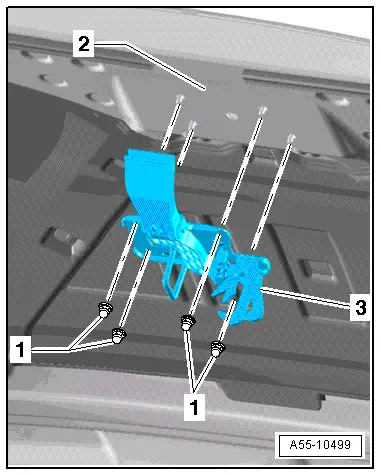
Hood Release Lever, Removing
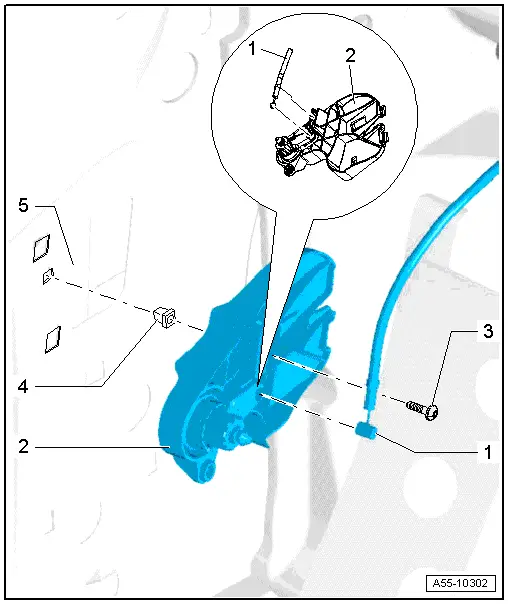
1 - Release Cable
- Clip the cable bracket into the mounting bracket as shown in the magnified section of the illustration.
2 - Hood Release Lever Bracket
- The hood release lever cover is removed.
- The trim for the "lower A-pillar is removed".
- Remove the screws -3- and disengage the cable -1-.
3 - Bolts
- 2 Nm
4 - Clip
5 - A-Pillar
Catch, Removing and Installing
Striker Pin with Catch, Removing and Installing
Removing
- Remove nuts and remove catch.
Installing
Install in reverse order of removal.
Hinges, Removing and Installing
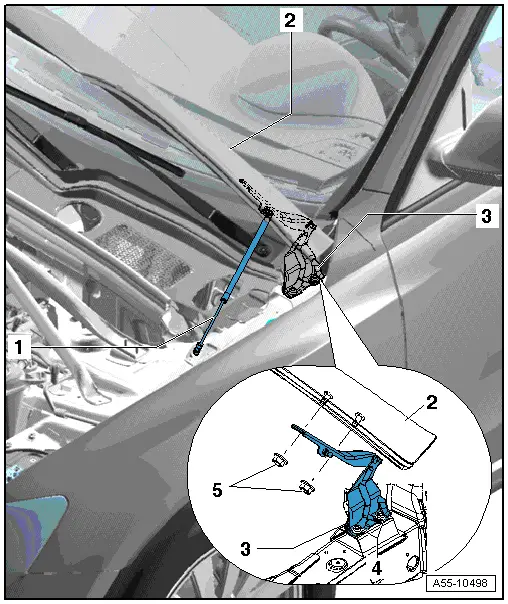
1 - Gas-Filled Strut
- Install the gas-filled strut tube on the hood side.
- Removing. Refer to → Chapter "Overview - Gas-Filled Strut".
2 - Hood
3 - Nut
- 25 Nm
4 - Hood Hinge
- Before removing a hinge, support the lid or secure it against falling.
- Install the gas-filled strut. Refer to → Chapter "Overview - Gas-Filled Strut".
- Remove the bolts -4- and nuts -5-.
- Install in reverse order of removal.
5 - Nut
- 21 Nm
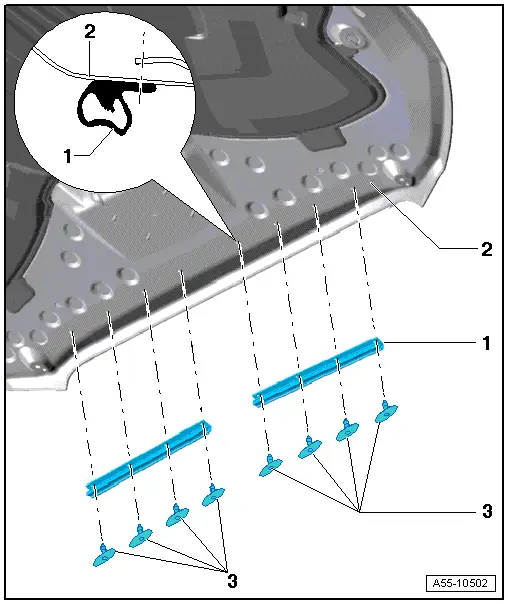
Insulation, Removing and Installing
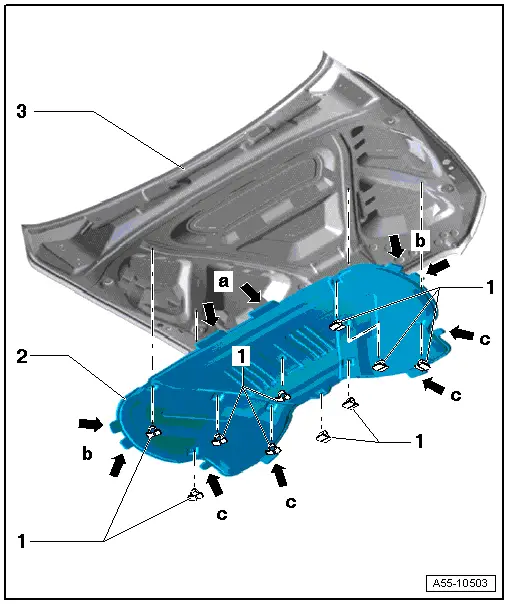
1 - Clip
2 - Hood Lining
- Installation:
- Slide the lining over the tabs on the rear edge into the holes provided on the inner panel.
- Slide the tabs on the front edge and the sides into place.
- The clips must engage audibly when pressing in.
3 - Door
4 - Clip
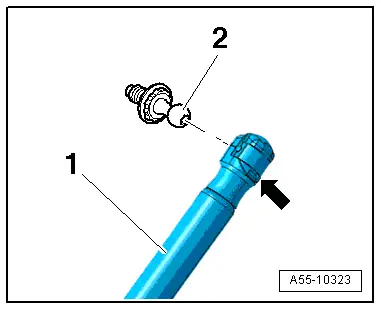
Gas-Filled Strut, Removing and Installing
Removing
- Support the lid or secure it against falling.
- Using a small screwdriver, lift the securing spring -arrow- slightly and remove the gas-filled strut -1- from the upper ball stud -2-.
- Repeat procedure on lower ball stud.
Installing
 Note
Note
After completely removing gas-filled strut, ensure correct position when installing: gas-filled strut tube must be engaged on hood side.
- Press gas-filled strut onto ball stud and engage.
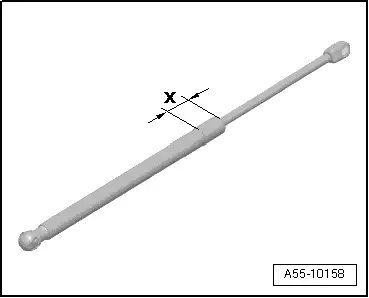
Gas-Filled Strut, Releasing Gas
- Clamp gas-filled strut in a vise in area -x- = 50 mm.
 WARNING
- Clamp only within this area, otherwise accident could occur!
- Wear protective eyewear when sawing.
 Note
Note
Cover area of sawn portion with a rag to absorb oil spraying out.
- Cut through the gas-filled strut cylinder within the first third of the overall cylinder length using the piston rod end of the cylinder as a reference point.
Impact Guard, Removing and Installing
 Note
Note
The impact guard is also equipped with double-sided adhesive tape.
1 - Door
2 - Impact Guard
- To remove, remove the clip from the hood and then remove the impact guard.
3 - Clip

