Audi Q5: Fuel Filler Door Unit
Overview - Fuel Filler Door Unit
 Note
Note
If removed, the tank flap must be replaced.
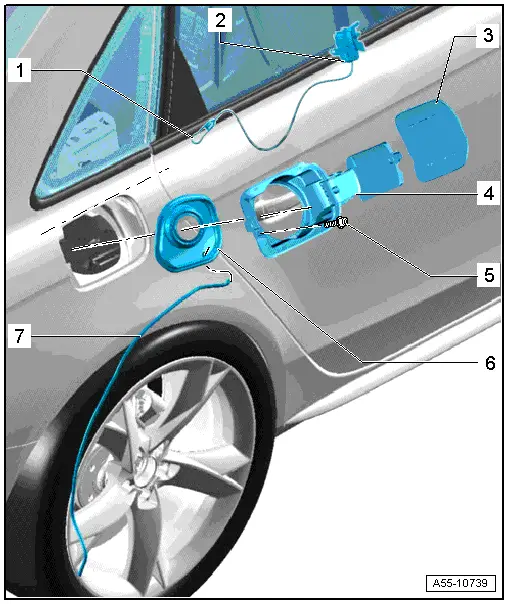
1 - Emergency Release Cable
- Guide cable through opening in fuel filler door cup.
2 - Fuel Filler Door Unlock Motor -V155-
- Removing:
- The fuel filler door is removed.
- Pull the Comfort System Central Control Module -J393- into the luggage compartment and pull it forward.
- Remove the Fuel Filler Door Unlock Motor -V155- forward off the body flange and disconnect the electrical connector.
- Installing:
- Slide the Fuel Filler Door Unlock Motor -V155- onto the flange and slide the emergency release into the luggage compartment.
3 - Fuel Filler Door Cover
- Removing
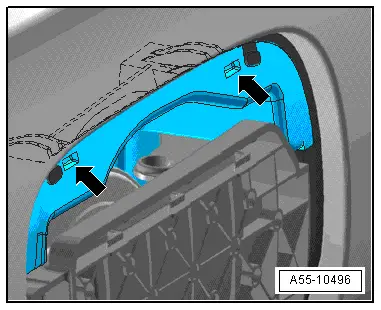
4 - Fuel Filler Door
- Insert fuel filler door diagonally until catches on protruding flange engage in side panel.
- Bolt the door and the door release motor together using the bolt -4-.
5 - Bolt
- 1.7 Nm
6 - Fuel Filler Door Cup
7 - Drain Hose
- Do not bend.
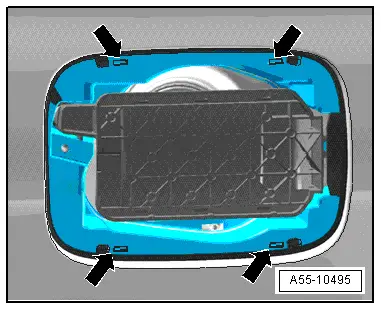
Fuel Filler Door, Removing
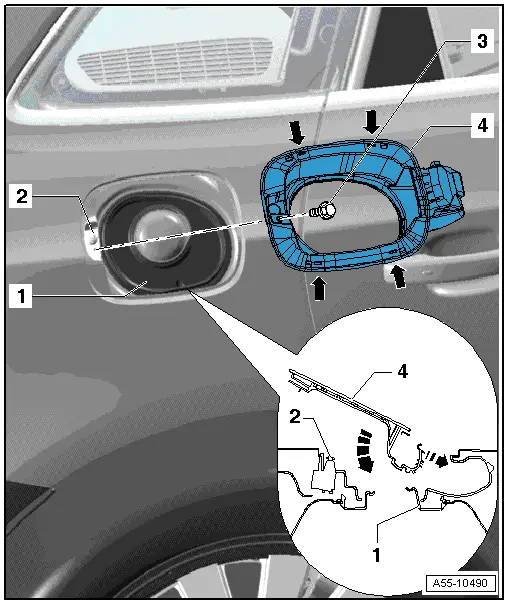
1 - Fuel Filler Door Cup
2 - Fuel Filler Door Unlock Motor -V155-
3 - Bolt
- 1.7 Nm
4 - Fuel Filler Door
- To remove: remove the bolt -3- disengage the fuel filler door -arrows- and then pull the fuel filler door at an angle off the side panel at.
- Guide the emergency release cable through the opening in the fuel filler door cup.
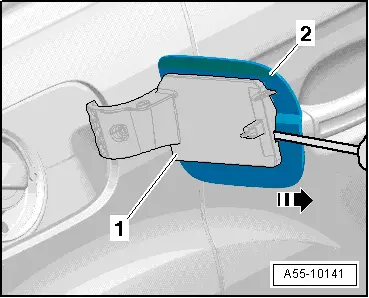
Fuel Filler Door Cover, Removing and Installing
Removing
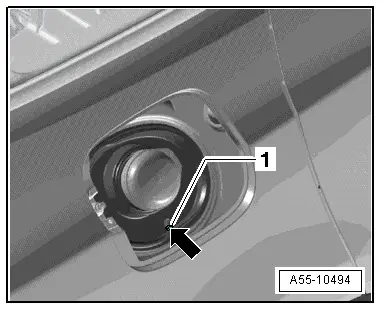
- Insert a screwdriver as shown between flap -2- and flap mount -1- and release the lug.
- Pull flap slightly toward rear -arrow- out of lug.
- Remove flap from the side.
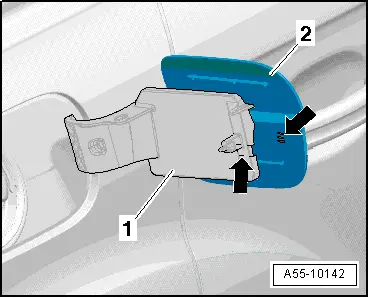
Installing
- Insert flap into cutout in mounts.
- Slide lid -2- forward until locking mechanism -arrows- on mount -1- engages.
Removing and Installing Fuel Filler Door
Remove the fuel filler door insert.
- Release the tank flap insert at the markings -arrows-.
- To do this, insert a small screwdriver diagonally from underneath through the marking in the tank flap insert over the latches.
- Gently lift the screwdriver and release the latches.
- Pull the tank flap insert in steps out of its cut-out.
Tank Flap Gap Dimensions
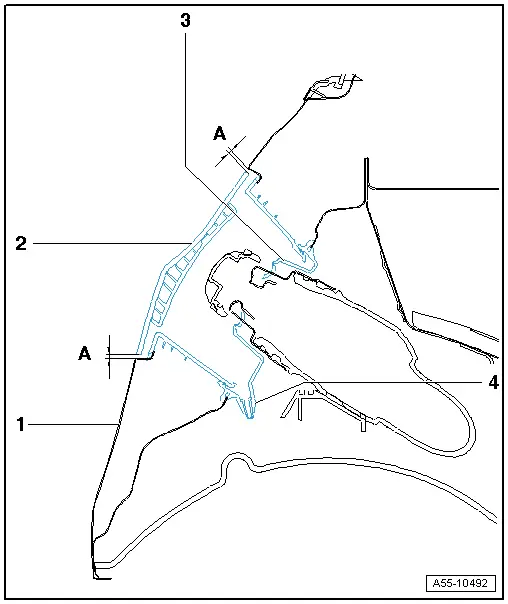
1 - Side Panel
2 - Fuel Filler Door Glass Panel
- Adjust distance -A- = 2.2 mm evenly to the side panel.
3 - Fuel Filler Door Cup
- Slide all around onto body flange as shown.
4 - Drain Hose
- Route it without kinking it.
Fuel Filler Door Cup, Removing and Installing
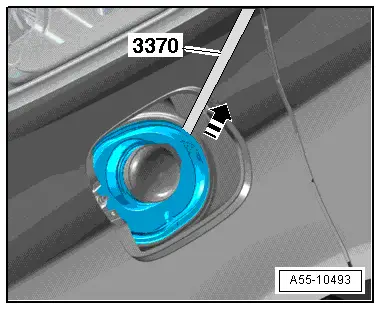
Special tools and workshop equipment required
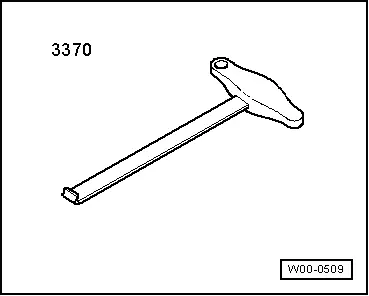
- Backrest Panel Tool -3370-
Fuel Filler Door Cup, Removing
- The fuel filler door is removed .
- Pull the fuel filler door cup vertically down out of the body opening using a Special Hook - 3370-.
Fuel Filler Door Cup, Installing
Installation is performed in the reverse order of removal. Note the following.
- To route the drain hose without kinking it, the edge of the drain hole in the fuel filler door cut up align with the edge of the hole in the body -arrow-.
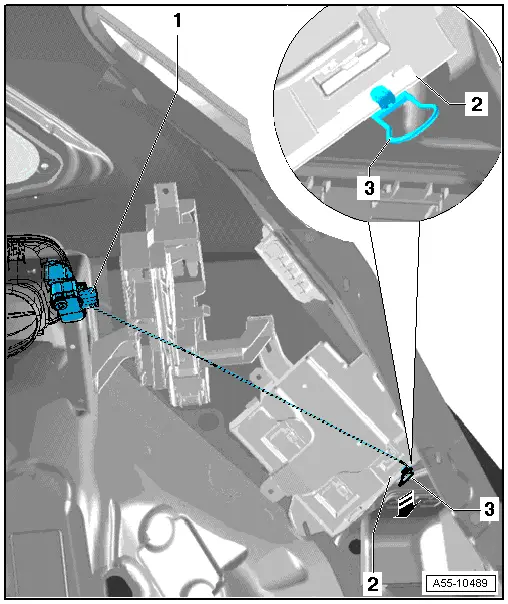
Fuel Filler Door Cup Drain Hose, Removing and Installing
1 - Drain Hose
- Route the drain hose as shown under the wheel housing liner and insert it in the lower guide piece.
2 - Fuel Filler Door
3 - Rear Guide Piece
- Loosen the wheel housing liner in the area of the drain hose and move it to the side.
- Insert the drain hose as shown into the guide in the the lower wheel housing liner.
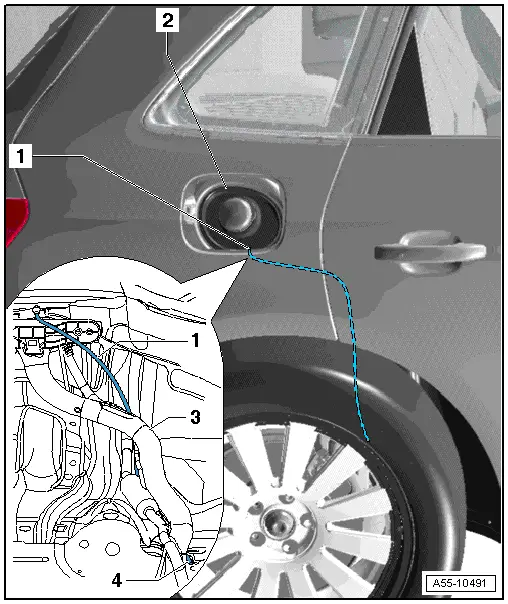
Fuel Filler Door Emergency Release, Removing and Installing
1 - Fuel Filler Door Unlock Motor -V155-
2 - Emergency Release Cable
- Insert the Fuel Filler Door Unlock -V155- ash sown with the cable over the tank opening.
- Pull the cable back into the vehicle interior and connect it with the tab on the flange on the Comfort System Central Control Module -J393-.
3 - Side Panel
Special Tools
Special tools and workshop equipment required
- Backrest Panel Tool -3370-
- Gauge - Gap Adjustment -3371-


