Audi Q5: Front Brake Caliper
Overview - Front Brakes, 1LA, 1LJ, 1ZB and 1ZT
 Note
Note
- The single-piston brake 1LA/1LJ/1ZB/1ZT is illustrated.
- When servicing, always install entire repair kit.
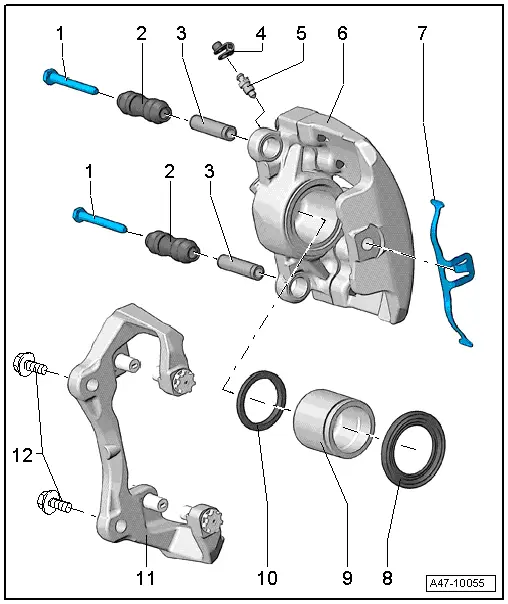
1 - Bolt
- 30 Nm
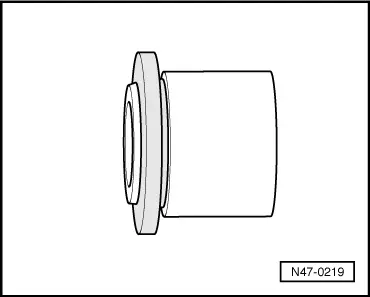
2 - Protective Cap
- Insert in brake caliper
3 - Guide Pin
- Slide through the boot
4 - Protective Cap
- Install on the bleeder valve.
5 - Bleeder Valve
- 15 Nm
- Before installing, lightly lubricate thread with assembly paste. Refer to Parts Catalog.
6 - Brake Caliper
7 - Spring
- Ensure installation position is correct.
8 - Protective Cap
- Do not damage when installing piston
- Coat with a thin layer of lithium grease. Refer to Parts Catalog
9 - Piston
- Coat with a thin layer of lithium grease. Refer to Parts Catalog
10 - Seal
- Coat with a thin layer of lithium grease. Refer to Parts Catalog
11 - Brake Carrier
- Removing and installing
- The four retaining pins for the brake pads on the brake carrier must not be loosened under any circumstances.
12 - Bolt
- 196 Nm
Brake Caliper Piston, Removing and Installing
Brake Caliper Piston, Removing and Installing, Single-Piston Brake
Special tools and workshop equipment required
- Assembly Paste -G 052 150 A2-
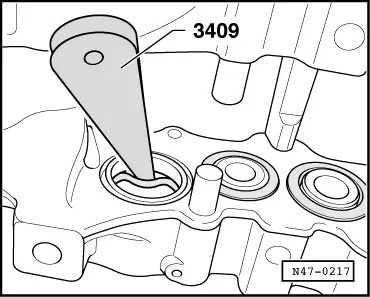
- Trim Removal Wedge -3409-
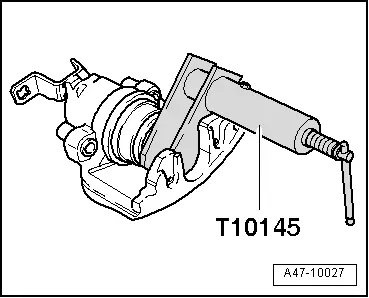
- Piston Resetting Tool -T10145-
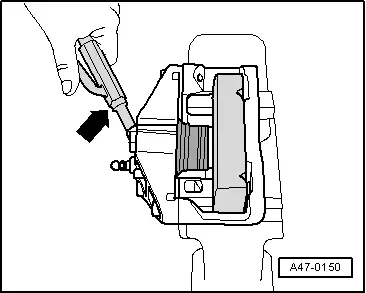
Removing
- Use compressed air to push the piston out of the brake caliper housing.
 Note
Note
Place a wooden board into the recess of the caliper housing so it is not damaged.
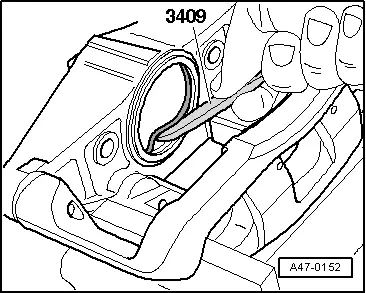
- Remove the seal.
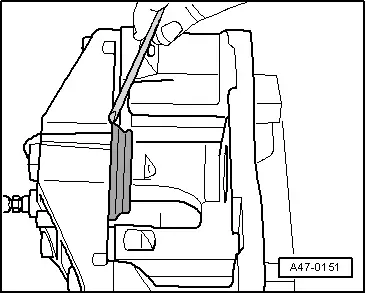
- To do so, use the Trim Removal Wedge -3409-.
 Note
Note
When removing, make sure that surface of cylinder is not damaged.
Installing
 Note
Note
Apply a thin layer of lithium grease to the brake cylinder, piston and seal. Refer to Parts Catalog.
- The surface of the piston and seal must only be cleaned with mineral spirits or commercially available and then dried.
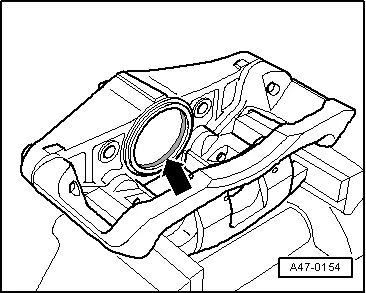
- Insert the inner seal in the brake caliper groove -arrow-.
- Press the protective cap onto the brake caliper housing so that it contacts the brake caliper housing all around.
- It should no longer be possible to remove the protective cap from the brake caliper housing by hand.
- Press the brake piston lightly on the protective cap.
Do not tilt the piston in order to avoid damaging the sealing boot.
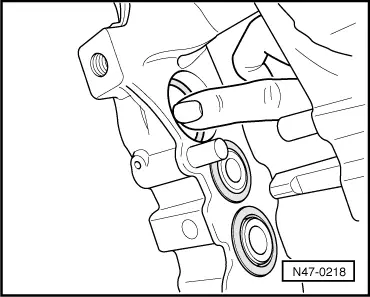
- Blow the protective cap on with pressurized air (max. 3 bar). The protective cap will thereby jump over the brake piston.
- Press the brake pistons into the caliper using Piston Resetting Tool -T10145-.
Do not tilt the piston in order to avoid damaging the sealing boot.
 Note
Note
The inner sealing lip of the protective cap thereby slips into the groove on the piston.
Brake Caliper Piston, Removing and Installing, Dual-Piston Brake
Special tools and workshop equipment required
- Trim Removal Wedge -3409-
- Piston Resetting Tool -T10145-
- Lithium Grease - G 052 150 A2-
 Note
Note
- Use only mineral spirits or commercially available brake cleaner to clean the brake caliper.
- Install complete repair kit when servicing.
- New brake calipers are filled with brake fluid and are pre-bled.
- Thinly coat the brake cylinder, piston and seal with Lithium Grease -G 052 150 A2-.
Removing
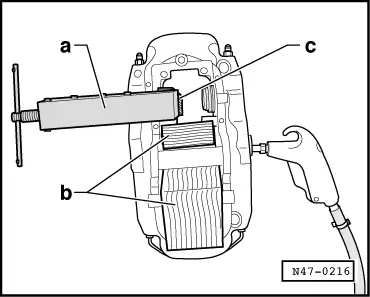
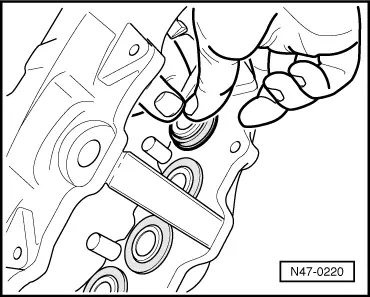
- Force piston from brake caliper housing, one at a time, using compressed air.
Only one piston can be pressed out at a time. Secure opposite piston in brake caliper housing using piston resetting tool -a-. Block the other pistons, for example, using wooden blocks -b-. In addition, place a wooden board -c- in front of the piston resetting tool so that the piston will not be damaged when pressed out.
- Remove the seal with the Trim Removal Wedge -3409-.
When removing, make sure that surface of cylinder is not damaged.
Installing
 Note
Note
Apply a thin layer of lithium grease to the brake cylinder, piston and seal. Refer to Parts Catalog.
- The surface of the piston and seal must only be cleaned with mineral spirits or commercially available and then dried.
- Insert oil seal in brake caliper housing.
- Install protective cap on piston.
- Push piston into brake caliper housing using constant pressure.
The protective cap must be seated properly in the groove, push slightly farther if necessary.
Cap and Guide Pin, Replacing
The guide pins must be removed if the protective caps are damaged.
 Note
Note
The single-piston brake 1LA/1LJ/1ZB/1ZT is described.

Removing
- Remove brake caliper.
- Remove the protective cap -2- on the outside from the groove on the guide pin.
- Pull the guide pin -3- outward out of the protective cap.
- Remove the protective cap from the brake caliper.
Installing
- Carefully press the guide pin into the protective cap as far as the first groove.
- Insert the protective cap in the brake caliper.
The protective cap must be seated in the center of the brake caliper.
- Press the guide pin through the protective cap.
The protective cap must not be seated in both grooves on the guide pin.
Check the movement of the guide pin. Both guide pins must slide.
- Install the brake caliper.

