Audi Q5: Rear Brake Caliper
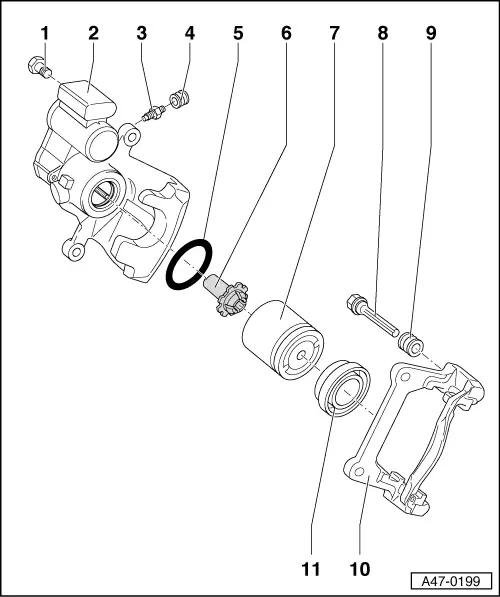
Overview - Rear Brake Caliper
 Note
Note
When servicing, always install entire repair kit.

1 - Self-Locking Screw
- 35 Nm
- Always replace.
- Counterhold at the guide pin when loosening and tightening.
2 - Brake Caliper Housing with Actuator
3 - Bleeder Valve
- 10 Nm
4 - Dust Cap
- Push onto bleed valve
5 - Seal
- Removing and installing. Refer to → Chapter "Brake Caliper Piston, Removing and Installing".
- Coat with a thin layer of lithium grease. Refer to Parts Catalog
6 - Pressure Nut
- To operate parking brake
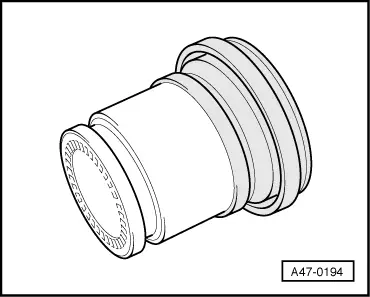
7 - Piston
- Coat with a thin layer of lithium grease. Refer to Parts Catalog
8 - Guide Pin
- Grease before pulling on protective cap
- Delivered as a replacement part with sufficient grease.
9 - Protective Cap
- Pull onto the brake carrier and guide pin.
10 - Brake Carrier with Guide Pins and Cap
- Supplied as an assembled replacement part with sufficient grease on guide pins
- Install the repair kit if the caps or guide pins are damaged. Use grease packet supplied to lubricate guide pins.
11 - Protective Cap
- Removing and installing. Refer to → Chapter "Brake Caliper Piston, Removing and Installing".
- Pull onto the piston with the outer sealing lip.
- Coat with a thin layer of lithium grease. Refer to Parts Catalog
Brake Caliper Piston, Removing and Installing
Special tools and workshop equipment required
- Torque Wrench 1331 5-50Nm -VAG1331-
- Torque Wrench 1332 40-200Nm -VAG1332-
- Trim Removal Wedge -3409-
- Piston Resetting Tool -T10145-
Removing
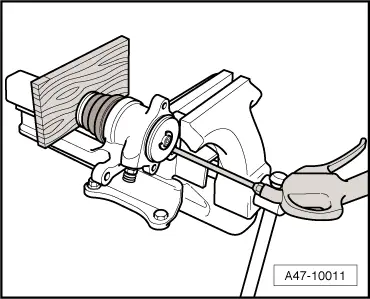
- Remove pistons as far as possible from brake caliper
- Use compressed air to push the piston out of the brake caliper housing
 Note
Note
- When removing, make sure that surface of cylinder is not damaged.
- Place a wooden board into the recess of the caliper housing so it is not damaged.
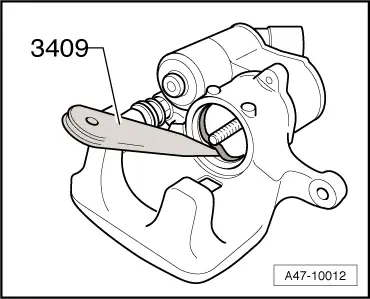
- Remove the old seal from the brake caliper with Trim Removal Wedge -3409-.

Installing
 Note
Note
Apply a thin layer of lithium grease to the brake cylinder, piston and seal. Refer to Parts Catalog.
- The surface of the piston and seal must only be cleaned with mineral spirits or commercially available and then dried.
- Install new seal in brake caliper.
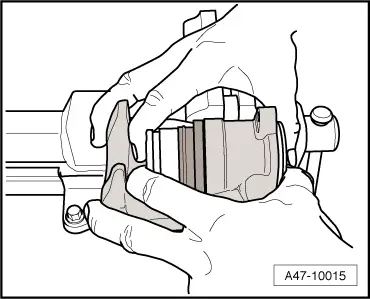
- Place new protective cap on brake pistons as shown.
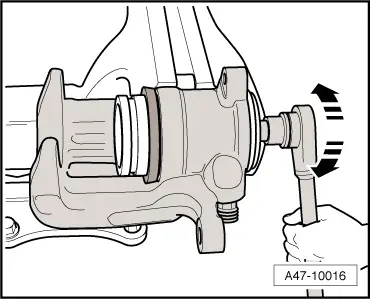
- Install pressure nut to dimension -a- 15 mm.

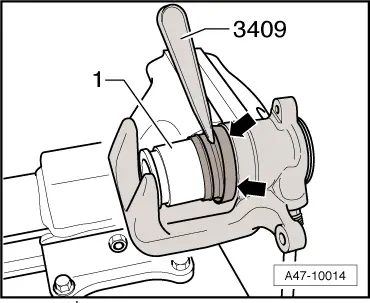
- Insert protective cap in brake caliper groove. Use the Trim Removal Wedge -3409- to do this.
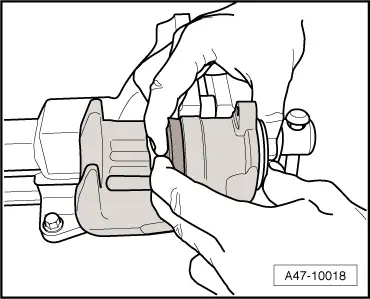
- Carefully slide brake piston into brake caliper. Move brake piston when doing so. Brake piston must be guided over pressure nut, this is only possible in four positions.
- After brake piston has been guided onto pressure nut, press it as far as stop into brake caliper.
 Note
Note
Make sure that pressure nut is not damaged.
- Install the pressure nut clockwise as far as the stop.
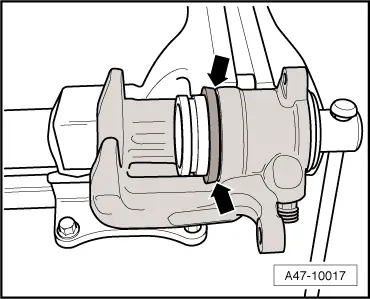
- Make sure the rubber makes contact around brake caliper housing -arrows-
- Press the piston into the brake caliper by hand
 Note
Note
The inner sealing lip of the protective cap thereby slips into the groove on the piston.
Cap and Guide Pin, Replacing
Install the repair kit if the caps or guide pins are damaged. Use supplied grease packet to lubricate guide pins
Removing
- Remove brake caliper.
- Remove the protective cap -9- from the nut on the brake carrier.
- Remove the guide pins -8- from the brake carrier.
- Remove the protective cap from the guide pin.
Installing
- Grease the guide pin before inserting.
- Slide the protective cap over the groove on the guide pin.
- Slide the guide pin -8- with the protective cap -9- through the brake carrier.
- Press the protective cap over the groove on the brake carrier.
- Install the brake caliper.

