Audi Q5: Window Frame Trim, Removing and Installing
Special tools and workshop equipment required
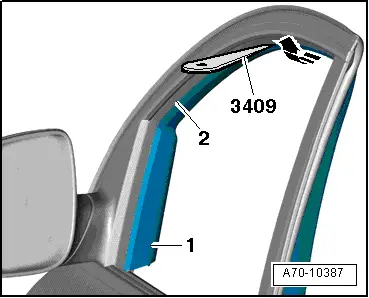
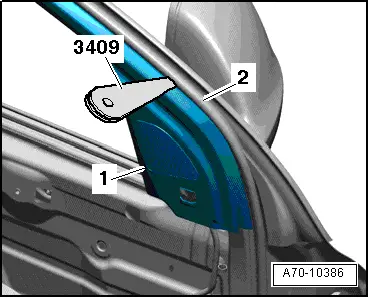
- Trim Removal Wedge -3409-
Removing
- Lower the door window.
- Remove the front door trim panel. Refer to → Chapter "Front Door Trim Panel, Removing and Installing".
- Remove the treble speaker trim. Refer to → Chapter "Treble Speaker Trim, Removing and Installing".
- Versions with a treble speaker: Remove the treble speaker. Refer to → Communication; Rep. Gr.91; Sound System; Left/Right Front Treble Speaker R20/R22, Removing and Installing.
- With lane change assistance: Remove the Lane Change Assistance Button -E530-. Refer to → Electrical Equipment; Rep. Gr.96; Lane Change Assistance; Lane Change Assistance Button E530, Removing and Installing.
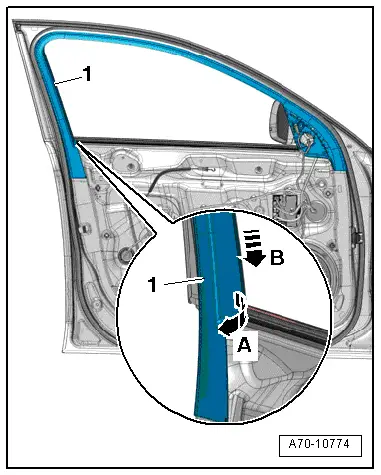
- Pry the window frame trim -1- out using the Trim Removal Wedge -3409- starting at the bottom and then all around the window frame guide -arrow A-.
- Remove the window frame trim from the window frame -arrow B- at the same time.
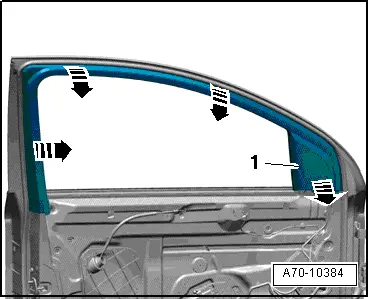
- Remove the window frame trim -1- from the window guide -arrows-.
Installing
- Install the window frame trim -1- into the window guide -2- starting on the inside at the bottom -arrow-.
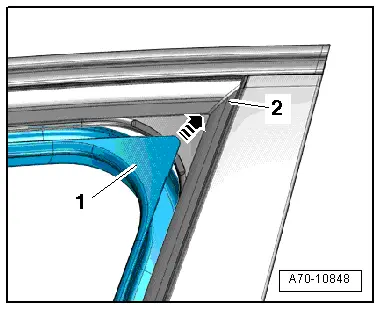
- Fold the window frame trim -1- over the window guide -2--arrow- using the Trim Removal Wedge -3409-.
 Note
Note
Be careful not to pull the window guide off the door frame.
- Pull the Trim Removal Wedge -3409- the entire length between the window frame trim -1- and door seal molding -2- and at the same time push the door frame trim toward the door frame.
Install in reverse order of removal.
Rear Lid Remote Unlock Switch -E188- Trim, Removing and Installing
Removing
- Remove the driver front door trim panel. Refer to → Chapter "Front Door Trim Panel, Removing and Installing".
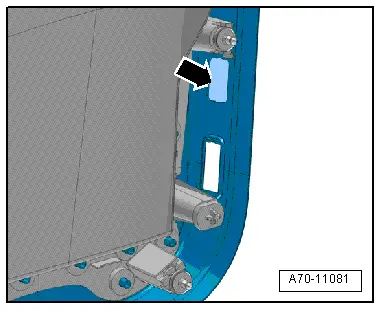
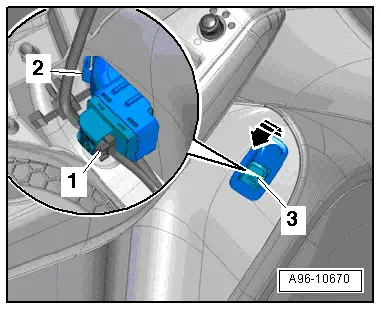
- Disconnect electrical connector -1- on the rear lid remote unlock switch.
- Release clips -2- and push trim -3- together with the rear lid remote unlock switch from the door trim -arrow-.
- Remove the rear lid remote unlock switch from the trim. Refer to → Electrical Equipment; Rep. Gr.96; Controls; Overview - Front Door Controls.
Installing
Install in reverse order of removal. Note the following:
- Press the trim on until it engages audibly.
Driver Memory Seat Control Head -E97-, Removing and Installing
Removing
- Remove the front door trim panel. Refer to → Chapter "Front Door Trim Panel, Removing and Installing".
- Remove the Driver Memory Seat Control Head -E97-. Refer to → Electrical Equipment; Rep. Gr.96; Controls; Overview - Front Door Controls.
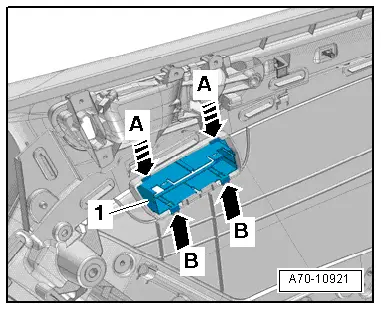
- Release the switch trim -1- first at the top -arrows A- and then forward and out of the door panel.
Installing
Install in reverse order of removal. Note the following:
- First insert the switch trim at the bottom -arrows B- and then press it in until it audibly locks in place.
Interior Monitoring Switch -E183-/ Alarm System Deactivation Switch -E217- Cut-Out, Additional Work in the Door Trim Panel
 Note
Note
- As an original part the drive side door trim panel is supplied without the cut-out for the switch Interior Monitoring Deactivation Switch -E183-/Alarm System Switch -E217-.
- If necessary, make a cut-out in the new trim panel as follows:
Procedure
- Make the cut-out in the door trim panel for the passenger compartment monitoring switch -E183-/-E217-; make the cut along the marking on the back of the panel.
- Install the front door trim panel. Refer to → Chapter "Front Door Trim Panel, Removing and Installing".