Audi Q5: Overview - Wheel Cover
Audi Q5 Type 8R (2008 - 2017) Service Manual / Body / Body Exterior / Exterior Equipment / Overview - Wheel Cover
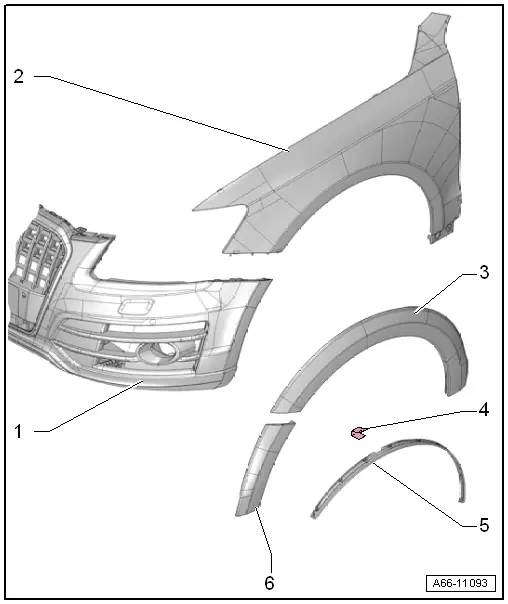
1 - Front Bumper Cover
2 - Fender
3 - Wheel Housing Cover for Fender
- There are different versions. Allocation. Refer to the Parts Catalog.
- Removing and installing. Refer to → Chapter "Wheel Cover, Removing and Installing, Version 1".
4 - Clamp
- Quantity: 9
5 - Fender Cover
- There are different versions. Allocation. Refer to the Parts Catalog.
- Removing and installing. Refer to → Chapter "Front Wheel Cover, Removing and Installing, Version 2".
6 - Wheel Housing Cover for Bumper Cover
- There are different versions. Allocation. Refer to the Parts Catalog.
- Removing and installing. Refer to → Chapter "Wheel Cover, Removing and Installing, Version 1".
 Caution
- The adhesive surfaces on the body must be free of dirt and grease.
- Clean the adhesive surfaces using Cleaning Solution -D 009 401 04-.
- Warm the adhesive surfaces to approximately 40 ºC (104 ºF) using a hot air blower.
- After installing, take the roller and press the covers one more time.
Overview - Heat Shield
Front Floor
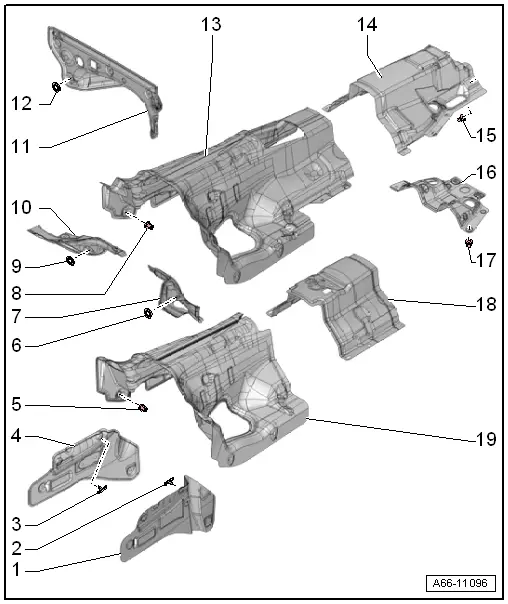
1 - Left Heat Shield
- For the longitudinal member
2 - Spring Clip
3 - Spring Clip
4 - Right Heat Shield
- For the longitudinal member
5 - Nut
- 2.1 Nm
6 - Lock Washer
7 - Left Heat Shield
- For the center of the tunnel
8 - Nut
- 2.1 Nm
9 - Lock Washer
10 - Right Heat Shield
- For the center of the tunnel
11 - Heat Shield
- For the plenum chamber bulkhead
- There are different versions. Allocation. Refer to the Parts Catalog.
12 - Lock Washer
13 - Long Heat Shield
- For the front of the tunnel
- There are different versions. Allocation. Refer to the Parts Catalog.
14 - Heat Shield
- For the back of the tunnel
15 - Nut
- 2.1 Nm
16 - Heat Shield
- For the propshaft
17 - Nut
- 2.1 Nm
18 - Heat Shield
- For the center of the tunnel
19 - Short Heat Shield
- For the front of the tunnel
- There are different versions. Allocation. Refer to the Parts Catalog.
Rear Floor
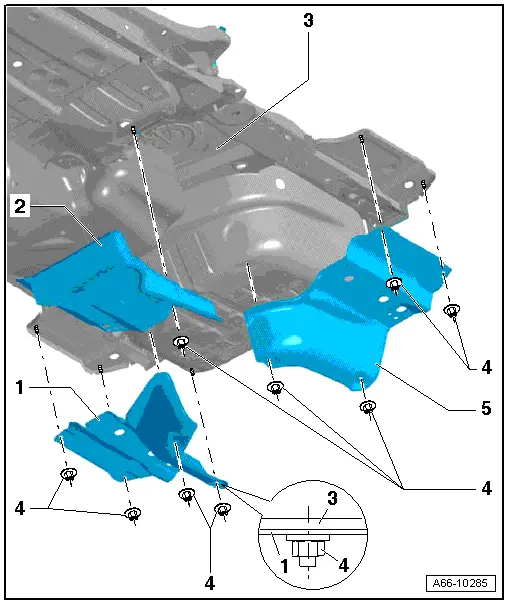
1 - Right Heat Shield
2 - Muffler Heat Shield
3 - Vehicle Rear
4 - Lock Washer
- When removing, unscrew it, when installing just press the lock washer on.
5 - Left Heat Shield
Overview - Sill Panel Seal
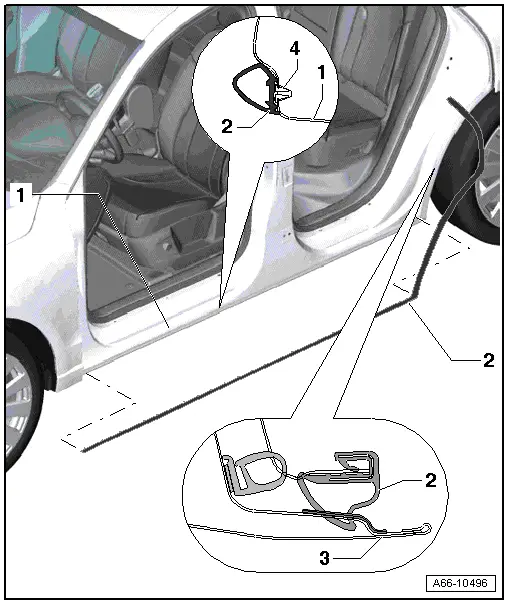
1 - Sill Panel
2 - Longitudinal Member Seal
- To remove, pull the seal off the clips on the sill panel starting at the front.
- The clips must be removed from the longitudinal member.
- If the same seal is being installed again, then the clips must be inserted into the seal first.
- Install the seal starting at the front and push it onto the body flange on the wheel housing.
- Push it in under the side window seal on the "C-pillar" and attach it to the side panel.
3 - Door
4 - Clip
- Install the clip into the seal before assembling.

