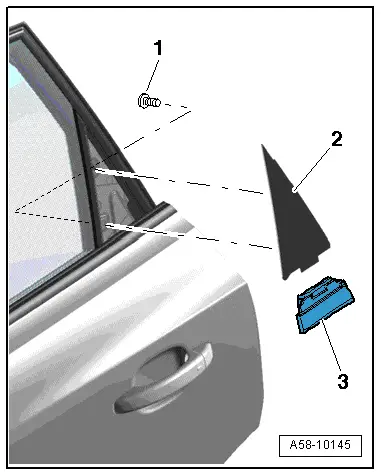
Audi Q5: Drip Rail, Removing and Installing
1 - Blind Rivet
- Quantity: 5
- Rivet the guide rails beginning at the top.
2 - Guide Rail
- To remove, drill out rivet heads -4- and drive out rivet shafts.
3 - Drip Rail
- Press into the guide rail as far as the stop, beginning at the top and working toward the bottom.
- Check for flushness at the transition to the "A-pillar".
B-Pillar Door Trim, Removing and Installing
Front Door
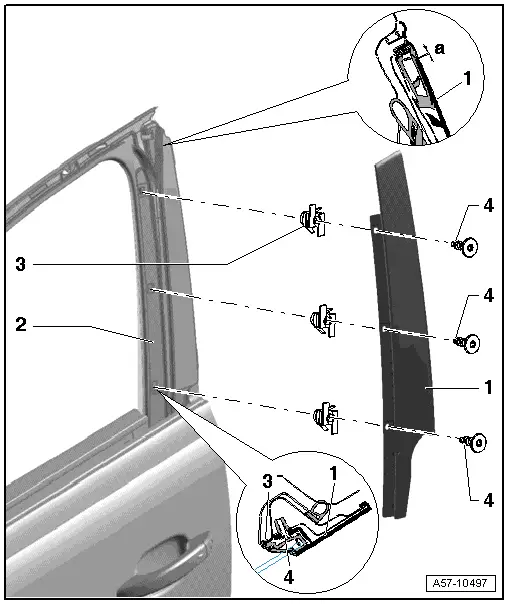
1 - "B-pillar" Trim
- Lower the door window.
- Disengage the window guide near the "B-pillar" from the trim and remove it.
- Remove the screws -4- and remove the trim from the door.
- When installing the window guide into the trim, coat the guide with a soapy solution.
2 - Door
3 - Clamp
4 - Bolt
- 2.5 Nm
Rear Door
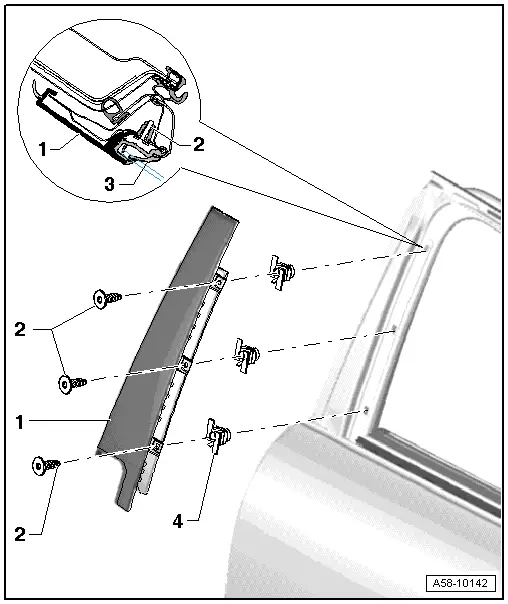
1 - "B-pillar" Trim
- Door Window, Removing. Refer to → Chapter "Rear Door Window, Removing and Installing".
- Remove the trim from the "C-pillar".
- Disengage the window guide near the "B-pillar" from the trim and remove it.
- Remove the screws -4- and remove the trim from the door.
- When installing the window guide into the trim, coat the guide with a soapy solution.
2 - Bolt
- 2.5 Nm
3 - Window Guide
4 - Clip
"B-Pillar" Seal
- Remove the "B-pillar" trim.
- To install, push the seal -1- in, peel off the protective film and press firmly onto the window frame -2-.

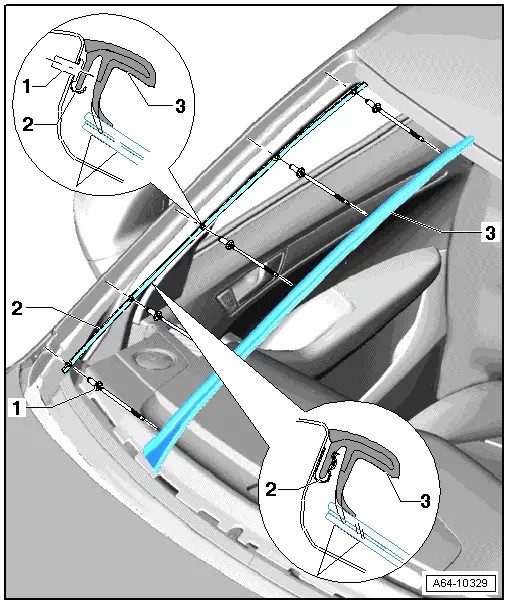
C-Pillar Door Trim, Removing and Installing
Removing
- The window frame trim is removed. Refer to → Body Interior; Rep. Gr.70; Rear Door Trim Panels; Overview - Rear Door Trim Panel.
- Remove the screw and push the trim down, then remove it from the window guide.
- Remove the seal -3- between the window shaft strip and the door.
Removing
Install in reverse order of removal.
Sill Panel Trim, Removing and Installing
 Note
Note
- The sill panel strip is secured to the side member using adhesive strips.
- It is not possible to remove without destroying.
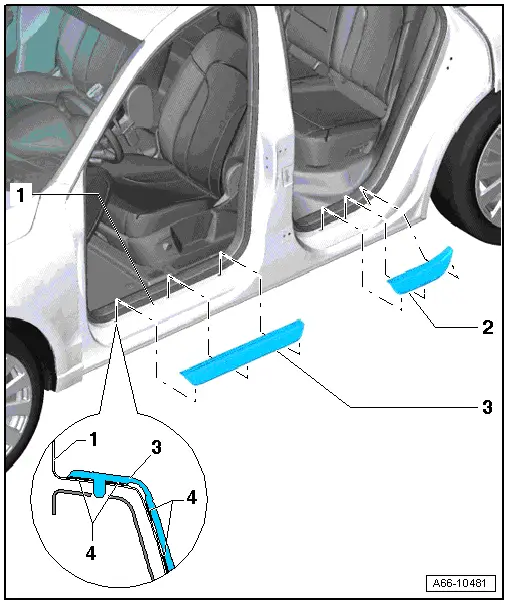
1 - Door Seal
2 - Rear Sill Panel Trim
- Removing:
- Heat the sill panel strip using a hot air gun and pull the molding upward and off.
- Installing:
- The side member must be free of dirt and grease in the adhesive area.
- Heat the adhesive surface to approximately 40 ºC with a hot air blower.
- Remove protective film from adhesive tape.
- Insert the sill panel strip with the centering pins in the side member and press it on firmly in stages from front to back.
3 - Front Sill Panel Trim
- Removal and installation same as with rear sill panel strip.
4 - Adhesive Tape
- Pull off protective foil before installing.
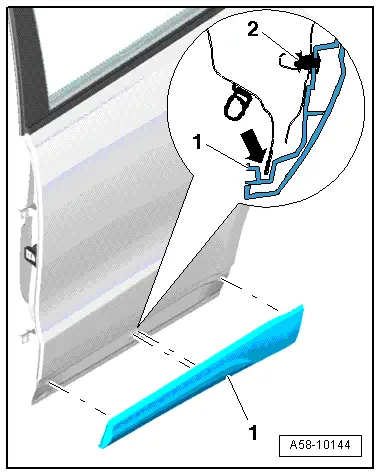
Door Gap Cover, Removing and Installing
 Caution
- The adhesive surfaces on the body must be free of dirt and grease.
- Clean the adhesive surfaces using Cleaning Solution -D 009 401 04-.
- Warm the adhesive surfaces to approximately 40 ºC (104 ºF) using a hot air blower.
- After installing, take the roller and press the covers one more time.
Front Door Gap Cover
- Unclip the upper door gap cover -1- starting from the back toward the front and then pull it off the door flange.
- Remove any remaining adhesive from the surface.
- Peel off the protective film from the two-sided adhesive tape.
- Position the cover on the door flange from underneath, align it so that it centered and then push it into the clips -2-.
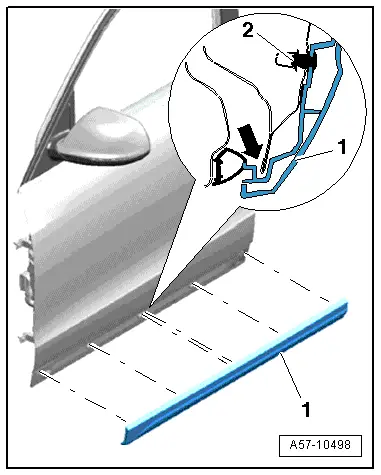
Rear Door Gap Cover
- Removing and installing is same as on the front door.