Audi Q5: Lock Cylinder, Removing and Installing
Removing
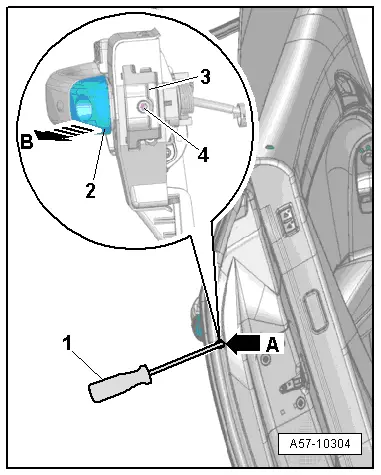
- Press the outer door seal to the side and remove the cover over the hole -arrow A-.
- Remove the clamping screw -4- all the way using a screwdriver -1-.
- Press the lock cylinder retaining bracket -3- toward the inside.
- Remove the lock cylinder -2- from the mounting bracket -arrow B-.
 Note
Note
If the lock cylinder cannot be pressed out, slide the key into it and remove it with the key turned slightly.
Installing
- Slide the lock cylinder into the mounting bracket and then check if the door lock closing and opening position functions.
Lock Cylinder Cap, Removing and Installing
Removing
- Remove the lock cylinder. Refer to → Chapter "Overview - Lock Cylinder".
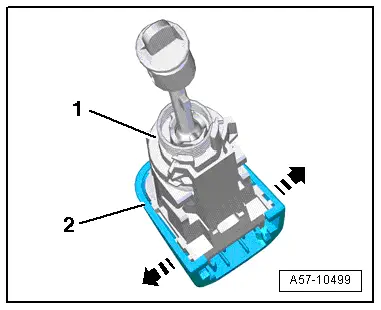
- Expand the clips -arrows- and remove the cap -2- from the lock cylinder -1- using a screwdriver if necessary.
Installing
- Press the lock cylinder cap on until it engages audibly.
 Caution
The magnet -item 2- must be pushed into the cap if the vehicle has a "keyless access authorization system".
Lock Cylinder Guide, Removing and Installing
Removing
- Remove the lock cylinder. Refer to → Chapter "Overview - Lock Cylinder".
- Remove the door trim panel. Refer to → Body Interior; Rep. Gr.70; Front Door Trim Panels; Front Door Trim Panel, Removing and Installing.
- Remove the door cover, refer to → Chapter "Door Inner Cover, Removing and Installing".
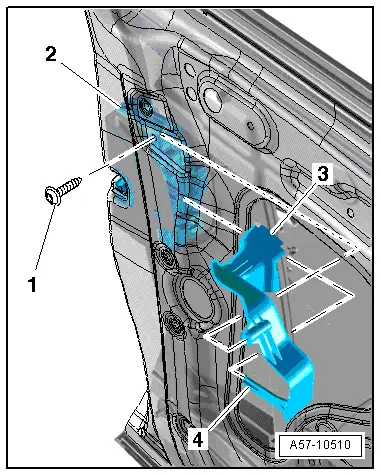
- Remove the bolt -1-.
- Squeeze the latch -4- together and remove the cover -3- from the door lock -2-.
Installing
- When installing, the latch -4- must audibly click inside the door lock.
- Tighten the bolt -1- to the tightening specification, refer to -9-.