Audi Q5: Brake Caliper, Removing and Installing, Brake 1LV and 1ZK, SQ5
Special tools and workshop equipment required
- Torque Wrench 1332 40-200Nm -VAG1332-
Removing
- Remove affected front wheel. Refer to →Wheel and Tire Guide; Rep. Gr.44.
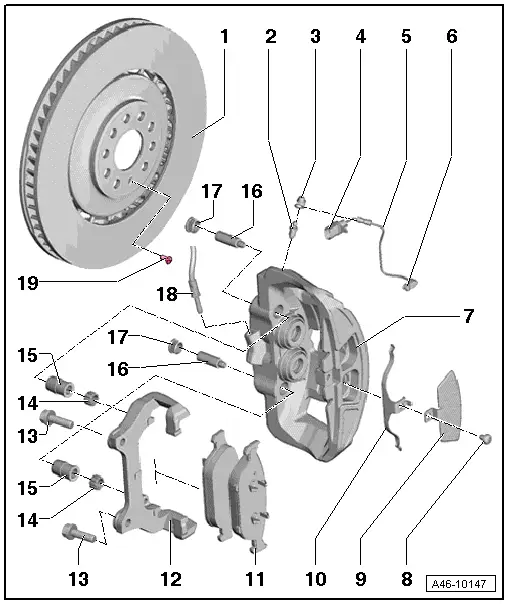
- Disconnect the connector for the brake pad wear display -arrow-.
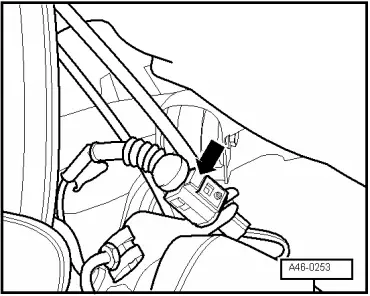
- Release the connector from the mount while turning it 90º at the same time.
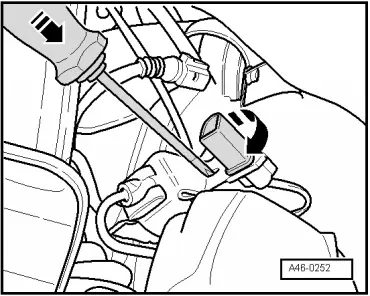
- Remove the connector from the bracket.
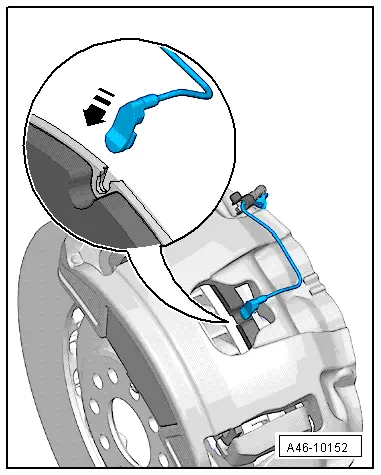
- Unhook brake line from retainer
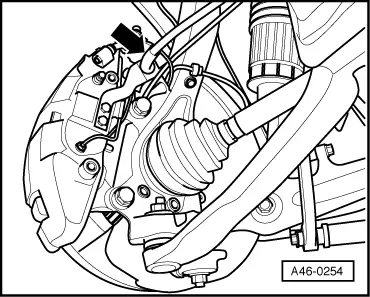
- Remove the bolts -13-.
 Note
Note
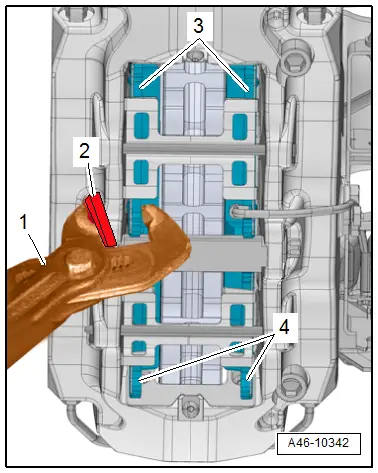
Pushing the brake pads slightly back with pliers makes it easier to remove the brake caliper from the brake rotor. To avoid damaging the brake caliper, place a piece of rubber or similar material -2- between the brake caliper. Do not damage the existing brake pad wear indicator cable when doing this.
- Remove the brake caliper -7- from the brake carrier -12-.
 Caution
- Do not let the brake caliper with the brake carrier hang on the brake hose. Do not support the weight with the brake hose.
- Replace the brake hose if damaged.
- Do not press the brake pedal when the caliper is removed.
Installing
- Tightening specifications. Refer to → Chapter "Overview - Front Brakes, 1LV and 1ZK, SQ5".
 Note
Note
- Replace bolts. Refer to Parts Catalog.
- Use only mineral spirits or commercially available brake cleaner to clean the brake caliper.
- Push the brake caliper -7- with the brake carrier -12- and the brake pads installed carefully over the brake rotor.
Make sure the brake hose is routed correctly. Make sure the brake hose is not blocked, bent or rubbing against the vehicle.
- Secure the brake carrier with new bolts -13-.
- Install the brake line in the bracket.
- Connect wear indicator connector.
 Note
Note
Make sure the contact for the brake pad wear display fits correctly in the clip inside the inner brake pad.
- Install the electrical connection for the brake pad wear display in the bracket.
- Mount the wheels. Refer to →Wheel and Tire Guide; Rep. Gr.44.
- Check brake fluid level, and fill if necessary.
 WARNING
There is the risk of an accident.
- Before moving the vehicle, press the brake pedal firmly several times to seat the brake pads correctly in their operating position.
- Make sure the brakes are working correctly before driving the vehicle.