Audi Q5: Windshield Wiper/Washer System
Washer Fluid Hoses
Washer Fluid Line Hose Connections, Disconnecting and Connecting
Various hose couplings are used to connect the hoses to the washer fluid pumps and spray jets or as coupling points.
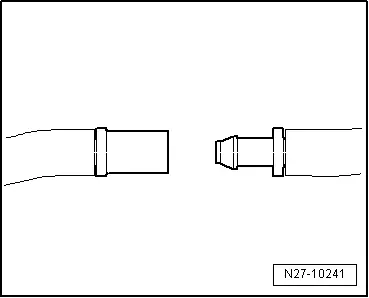
Unsecured Hose Coupling
- To disconnect the connection, pull both parts of the coupling apart.
- To connect, press both parts of the coupling together firmly until they noticeably engage.
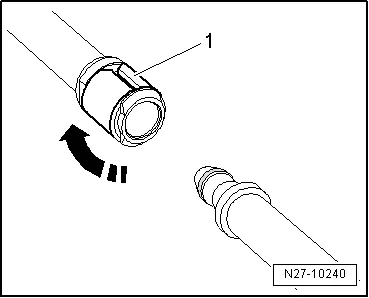
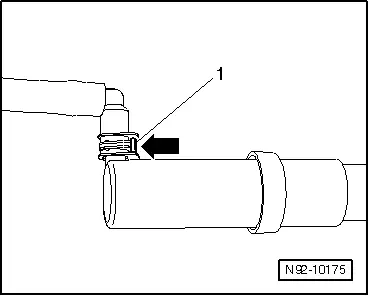
Secured Hose Coupling with Circlip
- To disconnect the connection, turn the circlip -1- 90º in direction of -arrow- and remove the hose connector.
- To connect, attach the hose connector and turn circlip -1- in direction of -arrow- until it engages.
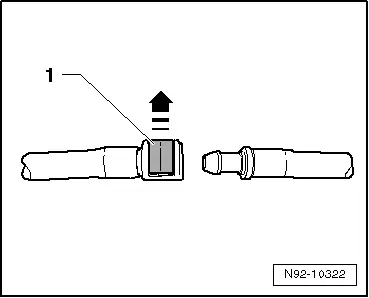
Secured Hose Coupling with Circlip, Version 1
- To disconnect the connection, pull circlip -1- up approximately 1 mm in direction of -arrow- and remove the hose connector.
- To connect, attach the hose connector and press the circlip in until it engages.
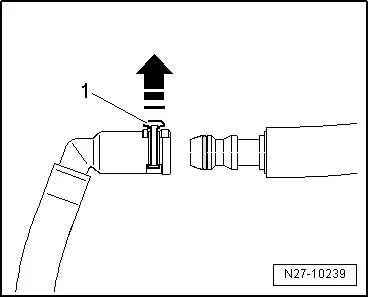
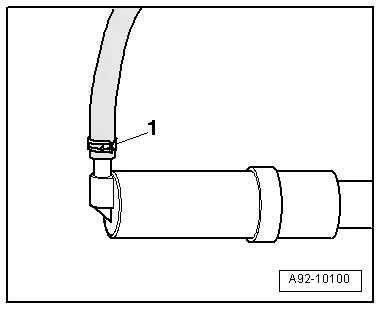
Secured Hose Coupling with Circlip, Version 2
- To disconnect the connection, pull circlip -1- up in direction of -arrow- and remove the hose connector.
- To connect, attach the hose connector and press the circlip in until it engages.
Headlamp Washer System Hose Connection with Circlip
- To disconnect the connection, press circlip -1--arrow- and remove the hose connector.
- To connect, hold the circlip pressed -arrow- and attach the hose connector.
- Make sure the connection is engaged securely by pulling on the hose without pressing the circlip.
Headlamp Washer System Hose Coupling with Clamp
- To disconnect the hose clamp connection -1-, cut with side cutting pliers and remove the hose connector.
- To connect, slide the new hose clamp onto the hose, attach the hose connector and install the hose clamp with Hose Clamp Pliers -VAG1275-.

Headlamp Washer System Hose Coupling with Spring Clamp
- To disconnect the connection, open spring clamp -1- with Hose Clip Pliers -VAG1921- and remove the hose connector.
- To connect, open the spring clamp with Hose Clip Pliers -VAG1921- and attach the connector.
Smooth Hose Washer Fluid Line, Repairing
 Note
Note
Smooth hoses with a diameter of 5x1 mm or 6x1 mm can be replaced with an EPDM (ethylene propylene diene monomer) hose. Refer to the Parts Catalog.
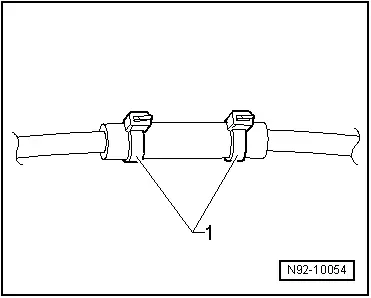
- Trim and remove damaged sections of hose.
- Select the appropriate EPDM hose -2- and cable tie Parts Catalog.
- Extend the EPDM hose -2- so that the smooth tube ends -1 and 3- can each be inserted approximately 10 mm into EPDM hose -2-.
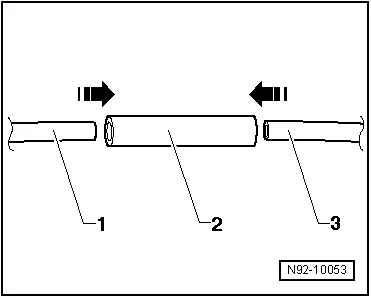
- Secure with cable ties as illustrated -1-.
- Check for function and leaks.
Corrugated Hose Washer Fluid Line, Repairing
 Note
Note
Corrugated hoses can be replaced with heat-shrink sleeves. Refer to the Parts Catalog.
Special tools and workshop equipment required
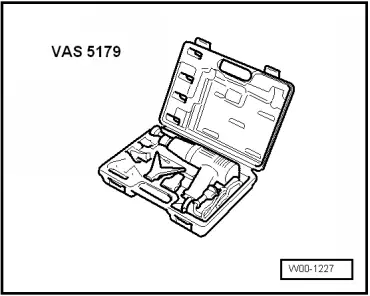
- Hot Air Blower -VAS5179- or
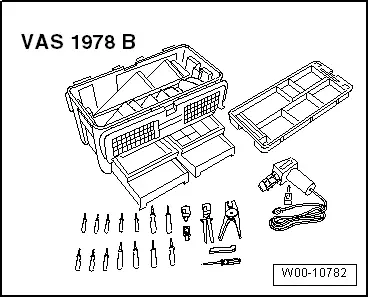
- Wiring Harness Repair Set - Hot Air Blower -VAS1978/14A- from the Wiring Harness Repair Set -VAS1978B-
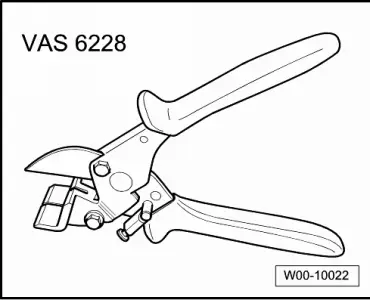
- Hose Cutting Pliers -VAS6228-
 Note
Note
- Area to be repaired must not be under stress of stretching or bending.
- If the damaged area is longer than 20 mm, a new section of corrugated hose must be inserted and the procedure described in the following must be performed twice.
Procedure
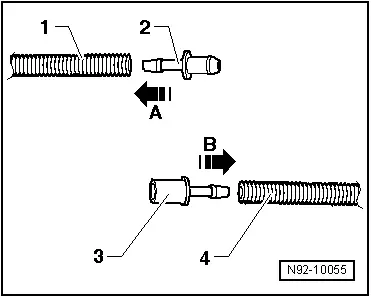
- Disconnect the damaged part of the washer fluid hose with the Hose Cutting Pliers -VAS6228-.
- Choose matching repair adapters -2 and 3- as well as appropriate heat-shrink tubing from the Parts Catalog.
- Warm the end of the corrugated tube -1- using the Hot Air Blower -VAS5179- .
- Press the connecting piece -2- into the corrugated tube -1- in direction of -arrow A-.
- Warm the end of the corrugated tube -4- using the Hot Air Blower -VAS5179- .
- Press the connecting piece -3- into the corrugated tube -4- in direction of -arrow B-.
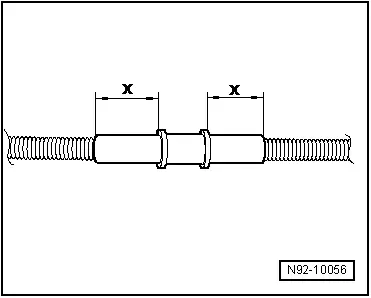
- Trim the heat-shrink sleeve so that corrugated tube is covered on both sides with a minimum of 20 mm -dimension x- of heat-shrink sleeve.
- Slide the heat-shrink tubing over the corrugated tube, attach the connecting pieces together and secure the repair area with heat-shrink tubing.
- The heat-shrink sleeve must be heated from the center outward until it seals completely.
- Set the hot air blower to the correct temperature according to the operating instructions.
- When shrinking, ensure no other lines, plastic parts or insulation material is damaged by the hot nozzle.
- Check for function and leaks.
Special Tools
Special tools and workshop equipment required
- Wiring Harness Repair Set - Hot Air Blower -VAS1978/14A- from the Wiring Harness Repair Set -VAS1978B-
- Hot Air Blower -VAS5179- or
- Hose Cutting Pliers -VAS6228-
- Hose Clamp Pliers -VAG1275-
- Hose Clip Pliers -VAG1921-