Audi Q5: Sunroof Panel, Removing and Installing
Removing
 Caution
Do not move the slotted guide rail when the glass panel is removed otherwise the wind deflector can get damaged.
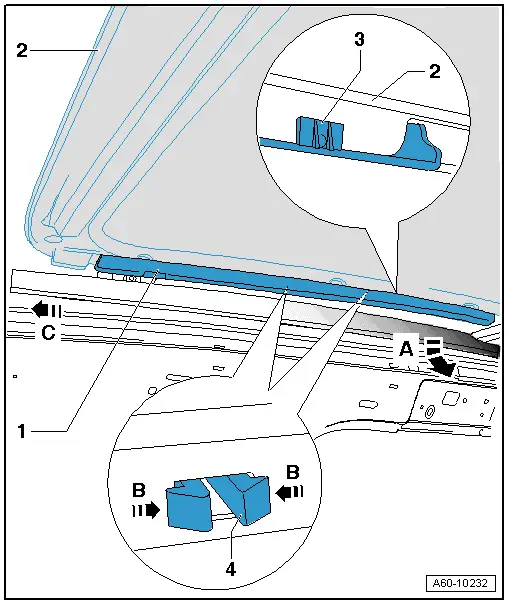
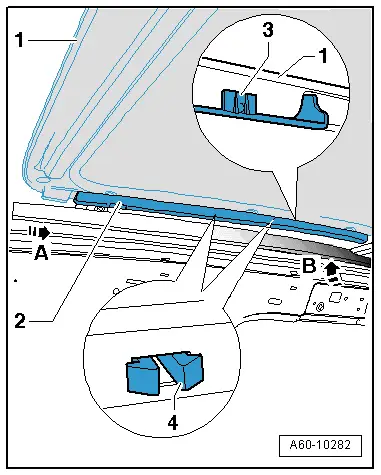
1 - Trim
2 - Front Glass Panel
- Removing:
- Open the glass panel -1- just far enough until the trim -2- is accessible.
- Remove the trim -2- in direction of -arrow A- and disengage the retaining tab -3- on the back side.
- Squeeze the catch -4- on the back -arrow B- and unclip the trim.
- Push the trim -2- in direction of -arrow C- and remove it.
- Remove the left and right screws on the front cover.
3 - Retaining Tab
4 - Locking Tab
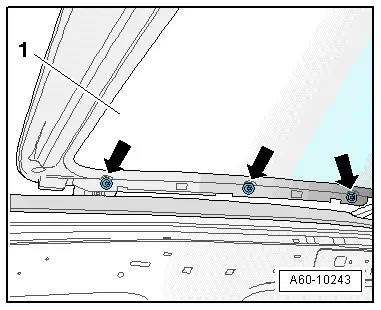
- Remove the left and right screws -arrows- from the glass panel -1-.
- Lift out the glass panel.
Installing
 Note
Note
- Always replace the screws when installing or removing the glass panel.
- Clean any remaining locking compound from the threaded holes with a thread cutter.
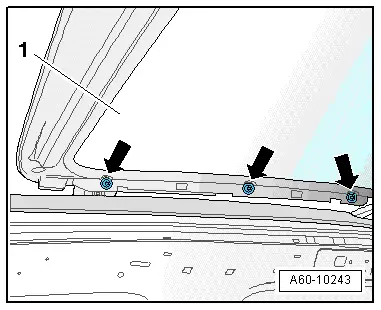
- Install the glass panel -1- from the top and install the screws -arrows- but do not tighten them.
- Front Glass Sunroof Panel, Adjusting. Refer to → Chapter "Sunroof Panel, Adjusting".
- Tighten the screws -arrows- to the tightening specification. Refer to -9-.
- Engage the front trim -2- into the glass panel -1- and slide it in direction of -arrow A-.
- Install the catch -4-.
- Engage the retaining tab -3- on the back -arrow B-.
- After completing this procedure, perform an adaptation on the sunroof motor. Refer to → Chapter "Power Sunroof Control Module -J245-, Programming".
Rear Sunroof Panel, Removing and Installing
Removing
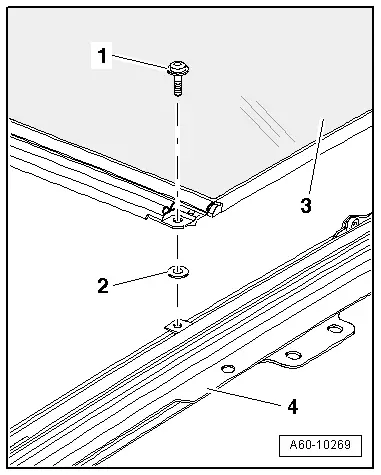
- Open the front glass panel all the way.
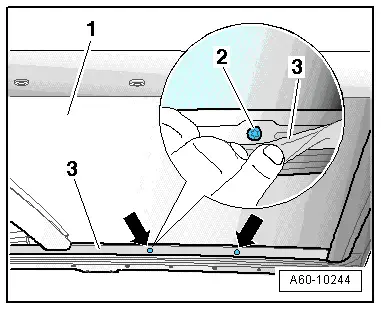
- Remove the screws -1- from the rear glass panel -3-.
- Remove the spacer -2- between the glass panel -1- and the frame -4-.
- Close the front glass panel.
- Gently pull the inner seal -3- inward at the marked locations -arrow- and remove the screws -2-.
- Lift out the rear glass panel -1-.
Installing
Installation is the reverse of removal.
 Note
Note
Replace the screws when installing or removing the glass panel.
- Install the glass panel from the top into the roof.
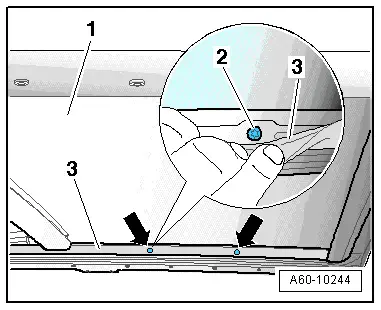
- Gently pull the inner seal -3- inward at the marked locations -arrow- and install the screws -2-, but do not tighten them.
- Adjust the rear glass panel. Refer to → Chapter "Sunroof Panel, Adjusting".
- After the rear glass panel is adjusted, tighten the screws to 5 Nm.
- After completing this procedure, perform an adaptation on the sunroof motor. Refer to → Chapter "Power Sunroof Control Module -J245-, Programming".