Audi Q5: Rear Bumper Cover, Removing and Installing
Special tools and workshop equipment required
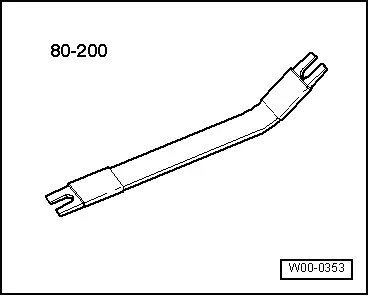
- Pry Lever -80 - 200-
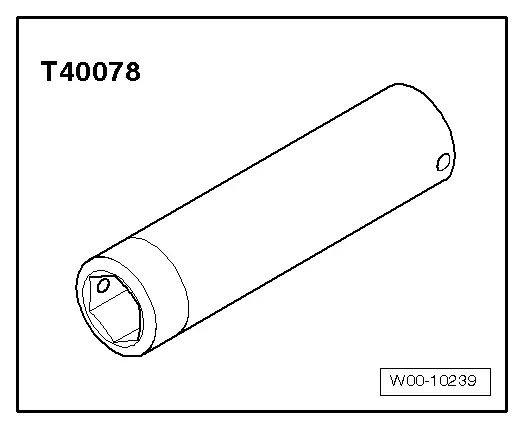
- Body Socket -T40078-
Removing
Vehicles through MY 2012:
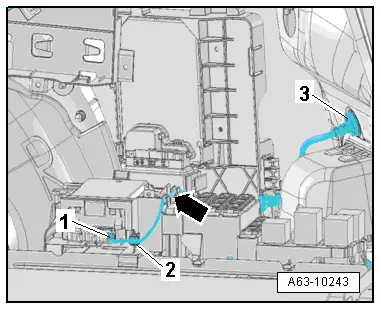
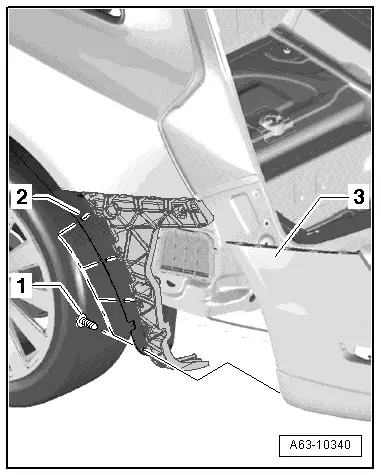
- Disconnect the electrical connector -1- on the Parking Aid Control Module -J446- if applicable.
- Free up the electrical wiring harness on the control module bracket -arrow- by disconnecting the cable tie -2-.
- Press the grommet -3- outward.
Vehicles from MY 2013:
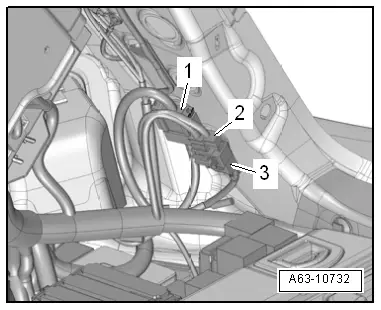
- Disconnect the connectors -1 and 3-.
- Unlock the connector mount -2- and free it up.
- Push the grommet toward the outside.
Continuation for all:
- Left: Remove the vehicle tools and the mount for the vehicle tools.
- Right: Remove the fuse panel F in the right side of the luggage compartment. Refer to → Electrical Equipment; Rep. Gr.97; Relay Panels, Fuse Panels and E-Boxes; Relay and Fuse Panels In Luggage Compartment on Right Side, Removing and Installing.
- Remove the rear lid end trim panel. Refer to → Body Interior; Rep. Gr.70; Luggage Compartment Trim Panels; Lock Carrier Trim Panel, Removing and Installing.
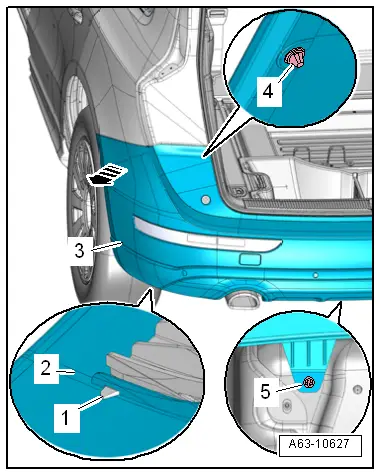
- Remove the nuts -3- from the threaded pins on the bumper cover -1-.
- Remove both nuts on the inside with a Body Socket - T40078-.
- Remove the bolts -1- from the wheel housing liner -2-.
- Remove the bolts -5- on the lower bumper cover section.
- Press the clip -4- on the bumper cover off using the Pry Lever - 80 - 200- as shown.
- Disengage the the lower bumper cover -2- from the guide pins -1-.
- Separate the side piece -3- from the rear side panel -arrow- and remove the bumper cover to the rear with a second technician.
Installing
- When installing, the side catches on the guide piece -2- must engage completely into the bumper cover -1-
- If the vehicle has lane change assistance, the lane change assistance control module -J769-/-J770- must be recalibrated. Refer to → Electrical Equipment; Rep. Gr.96; Lane Change Assistance; Lane Change Assistance, Calibrating.

Rear Bumper Guide Pieces, Removing and Installing
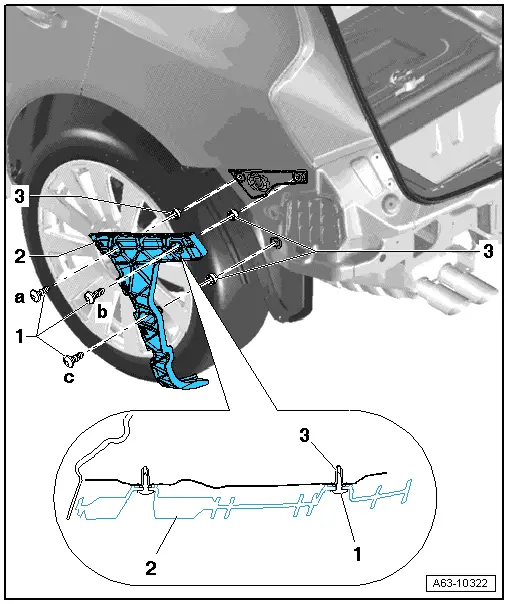
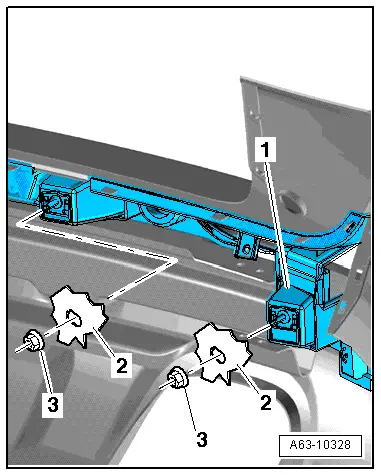
1 - Bolt
- 1.5 Nm
2 - Guide Piece
- Remove the rear bumper cover. Refer to → Chapter "Bumper Cover, Removing and Installing".
- When installing, tighten in sequence "a; b and c".
3 - Clip
Attachments, Removing and Installing
Spoiler
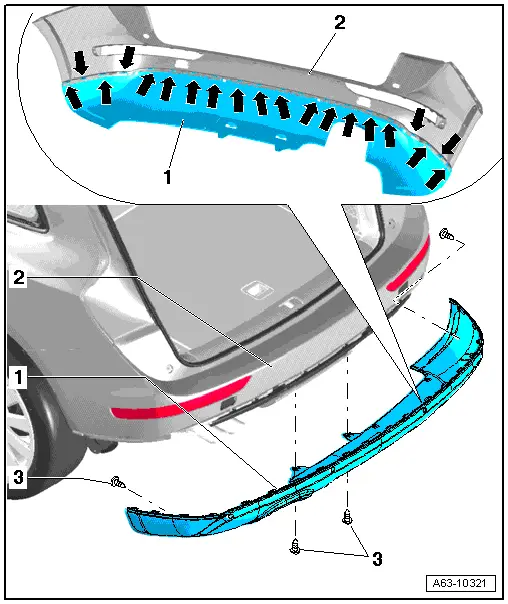
1 - Spoiler
- Remove the bolts -3-, if equipped.
- Disengage the bottom of the spoiler from the guide pins on the guide.
- To remove, release the catches -arrows- one by one and remove them from the bumper cover.
- Disconnect the connectors from the rear parking aid sensors.
- The clips -arrows- must clip into the bumper cover completely when installed.
2 - Bumper Cover
- Removed
3 - Bolt
- 1.5 Nm
Spoiler Trim Strip
Special tools and workshop equipment required
- Wedge Set -T10383-
Removing
- Remove the spoiler.
- Remove the bolts -2-.
- Release the retainer -3- and press the trim molding -1- off the bumper cover spoiler -4- using the wedge - T10383--arrow-.
Installing
Install in reverse order of removal.

Impact Member, Removing and Installing
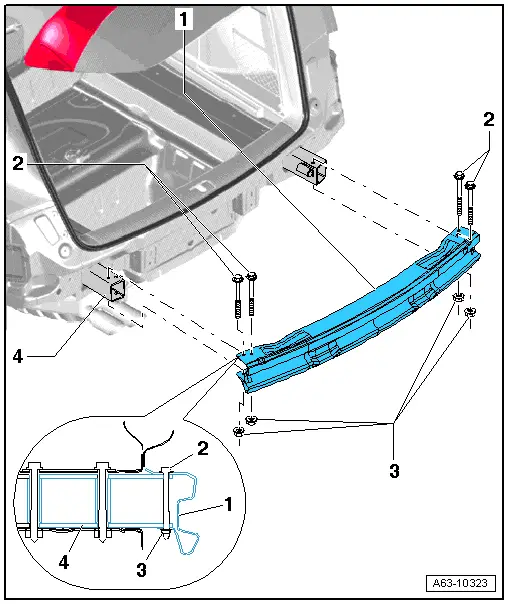
1 - Impact Member
- For vehicles without a trailer hitch
- Remove the rear bumper cover. Refer to → Chapter "Bumper Cover, Removing and Installing".
- Remove the bolts -1- while counterholding the nuts -3-.
- Remove the impact member.
2 - Bolt
- 15 Nm
3 - Nut
- 15 Nm
4 - Left Impact Member Mount
Impact Member Mount, Removing and Installing
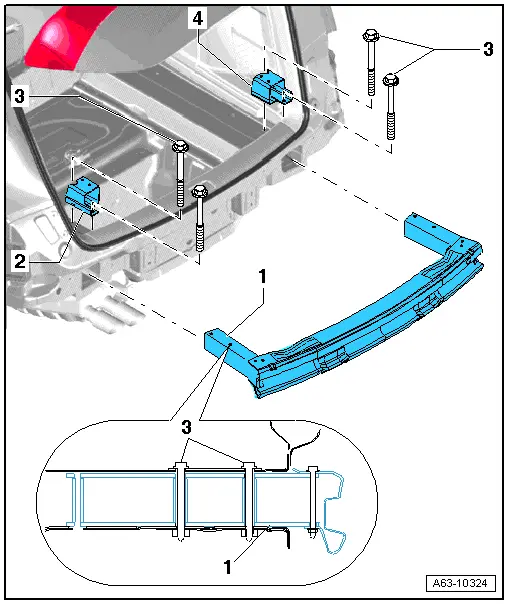
1 - Impact Member Mounts
- Removing:
- Remove the rear bumper cover. Refer to → Chapter "Bumper Cover, Removing and Installing".
- Remove the tie downs. Refer to → Body Interior; Rep. Gr.70; Luggage Compartment Trim Panels; Tie Down, Removing and Installing.
- Loosen the left and right luggage compartment side trim panel. Refer to → Body Interior; Rep. Gr.70; Luggage Compartment Trim Panels; Luggage Compartment Side Trim Panel, Removing and Installing.
- Remove the bolts -3- and remove the impact member and mounts.
2 - Left Console
3 - Bolt
- 40 Nm
4 - Right Console
Special Tools
Special tools and workshop equipment required
- Pry Lever -80 - 200-
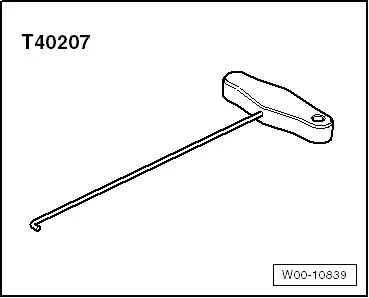
- Hook Tool -T40207-
- Body Socket -T40078-