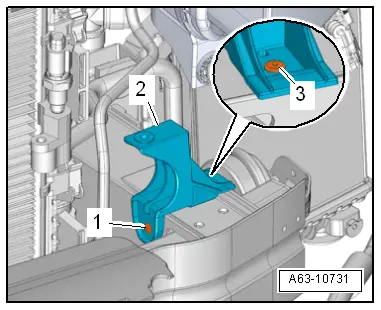
Audi Q5: Impact Member, Removing and Installing
Impact Absorber, Removing and Installing, Vehicles through MY 2012
Removing
 Note
Note
During installation, all cable ties must be installed at the same location.
- Remove the front bumper cover. Refer to → Chapter "Bumper Cover, Removing and Installing".
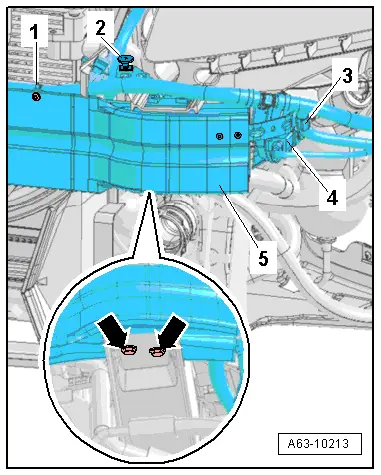
- Disconnect the electrical connector -4- on the horns and free up the electrical wiring harness -3- on the horn bracket.
- Free up the washer nozzle water drain hose by disconnecting the cable tie -1-.
- Remove the bolts -arrows- and the bumper cover spacer -2-.
- Remove the impact bar -5- from the mounts.
Installing
- Install the front bumper cover. Refer to → Chapter "Bumper Cover, Removing and Installing".
Impact Absorber, Removing and Installing, Vehicles from MY 2013
Removing
 Note
Note
During installation, all cable ties must be installed at the same location.
- Remove the front bumper cover. Refer to → Chapter "Bumper Cover, Removing and Installing".
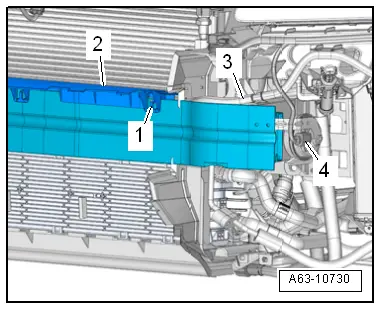
- Disconnect the connector -4- from the horns and free up the electric wiring harness on the horn bracket.
- Open the retainers -1- and remove the cover -2- from the impact member.
- Cut the cable tie and free up the windshield washer fluid hose -3- to the spray nozzle.
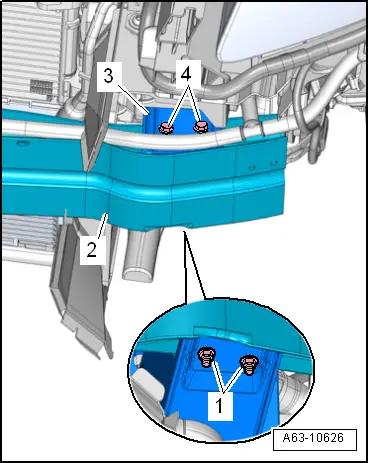
- Remove the nuts -1- and remove the bolts -4- upward.
- Remove the impact absorber -2- from the mounts -3-.
 Note
Note
Pry the impact bar out of the mounts if it is not easy to remove.
- The following parts must be removed when replacing the impact absorber:
- Remove the bracket for the Outside Air Temperature Sensor - G17-. Refer to → Chapter "Outside Air Temperature Sensor -G17- Bracket, Removing and Installing".
- Support for the headlamp housing mount. Refer to → Chapter "Headlamp Housing Mount Support, Removing and Installing".
Installing
- Install the front bumper cover. Refer to → Chapter "Bumper Cover, Removing and Installing".
Impact Member Bracket, Removing and Installing
Removing
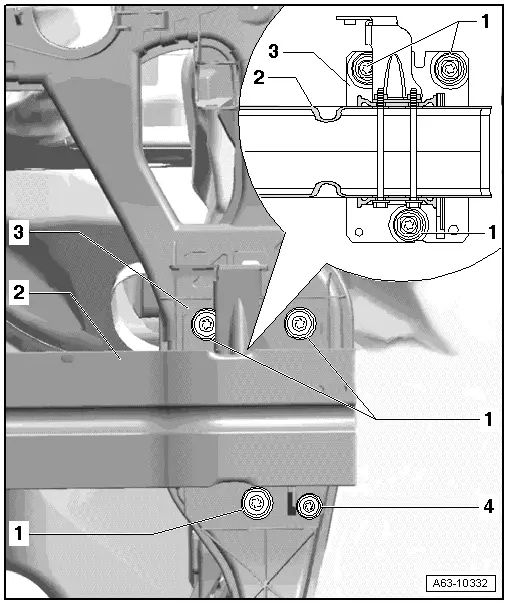
- Remove the impact absorber -2-. Refer to → Chapter "Impact Member, Removing and Installing".
- Mark the installation position of the lock carrier bracket.
- Remove the bolts -1-.
- Remove the bolt -4-.
- Remove the bracket -3- for the impact member.
Installing
Install in reverse order of removal. Note the following:
- Install the impact member bracket according to the marking made during removal.
- Install the impact member. Refer to → Chapter "Impact Member, Removing and Installing".
Headlamp Housing Mount Support, Removing and Installing
Special tools and workshop equipment required
- Drill
- Brill diameter 4 mm.
Removing
- Remove the front bumper cover. Refer to → Chapter "Bumper Cover, Removing and Installing".
- Remove the headlamp housing. Refer to → Electrical Equipment; Rep. Gr.94; Headlamps; Headlamp, Removing and Installing.
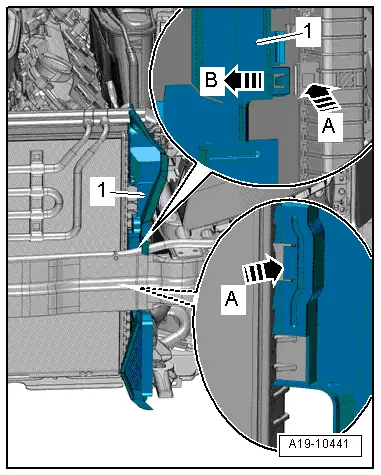
- Release the tabs -A arrows- and remove the air guide -1--B arrow-.
- Drill out the rivet heads -arrows-, strike the rivet shafts and remove the support -2-.
Installing
Install in reverse order of removal. Note the following:
- Install the headlamp housing. Refer to → Electrical Equipment; Rep. Gr.94; Headlamps; Headlamp, Removing and Installing.
