Audi Q5: Drive Axle Threaded Connection, Loosening and Tightening
Special tools and workshop equipment required
- Torque Wrench 80-400Nm -VAG1576-
- Digital Torque Wrench -VAG1756A-
Loosen the threaded connection between the drive axle and wheel hub
- With vehicle still standing on its wheels, loosen bolt a maximum of 90º, otherwise wheel bearing will be pre-damaged.
- Lift the vehicle just enough so that the wheels are hanging free.
- Operate brake (second mechanic required).
- Remove the bolt -arrow-.
Tighten the threaded connection between the drive axle and wheel hub
- Replace bolt -arrow-.
 Note
Note
- Before installing, clean the threads in the CV joint with a tap.
- Wheels must not yet touch the ground to tighten the drive axle, wheel bearing may otherwise be damaged.
- Operate brake (second mechanic required).
- Tighten bolt to 200 Nm.
- Lower the vehicle onto its wheels.
- Tighten bolt an additional 180º.

Drive Axle, Removing and Installing
Removing
- Loosen the connection between the drive axle and wheel hub. Refer to → Chapter "Drive Axle Threaded Connection, Loosening and Tightening".
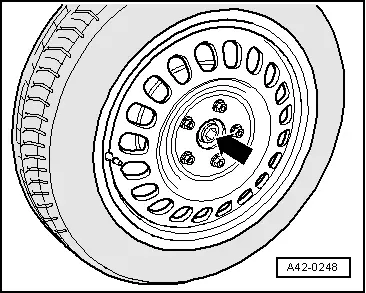
- Remove the wheel.
- Remove the coil spring. Refer to → Chapter "Spring, Removing and Installing".
- Remove the rear muffler. Refer to → Rep. Gr.26; Exhaust Pipes/Mufflers; Overview - Muffler.
- Remove the rear final drive. Refer to → Rep. Gr.39; Final Drive; Overview - Final Drive.
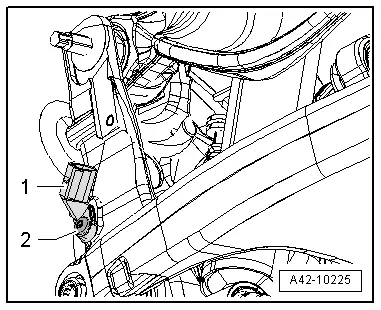
- Remove the rear wheel speed sensor -1-. Remove bolt -2-.
- Remove the drive axle toward the inside.
Installing
Install in reverse order of removal. Note the following:
Drive Axle tightening specifications. Refer to → Chapter "Overview - Drive Axle with 89 mm Outer CV Joint and 100 mm Inner CV Joint".
Drive Axle tightening specifications. Refer to → Chapter "Overview - Drive Axle with 94 mm Outer CV Joint and 107 mm Inner CV Joint".
- Install the rear final drive. Refer to → Rep. Gr.39; Final Drive; Overview - Final Drive.
- Install the rear muffler. Refer to → Rep. Gr.26; Exhaust Pipes/Mufflers; Overview - Muffler.
- Install the coil spring. Refer to → Chapter "Spring, Removing and Installing".
- Install the rear wheel speed sensor. Refer to → Brake System; Rep. Gr.45; Sensors; Right/Left Rear ABS Wheel Speed Sensor G44/G46, Removing and Installing.
- Tighten the wheel. Refer to → Chapter "Wheel Bolt Tightening Specifications".
- Tighten the drive axle to wheel hub threaded connection. Refer to → Chapter "Drive Axle Threaded Connection, Loosening and Tightening".
Outer CV Joint, Checking
The outer CV joint and cap cannot be disassembled.
The outer CV joint and cap can be only be inspected visually.
The grease still in the joint must be free of water and dirt.
If wear or damage is found on the ball journal surfaces, then the entire outer CV joint and cap must be replaced.
Grease Capacities and Types, Drive Axle with 88 mm or 100 mm Outer Constant Velocity Joint.
Inner CV Joint, Checking
It is necessary to disassemble the joint whenever replacing the grease or if the ball surfaces show wear or damage.
Disassembling
 Note
Note
Ball hub and joint are paired and should be identified before removal. Do not interchange cage allocation.
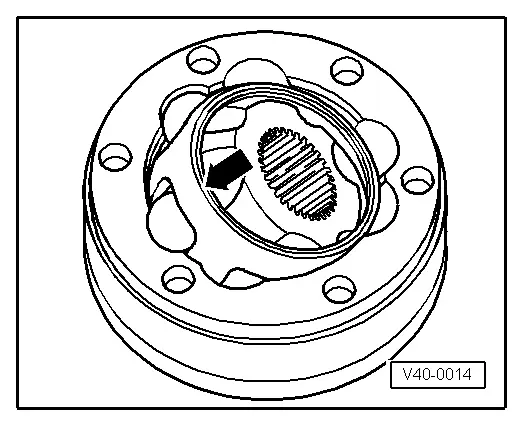
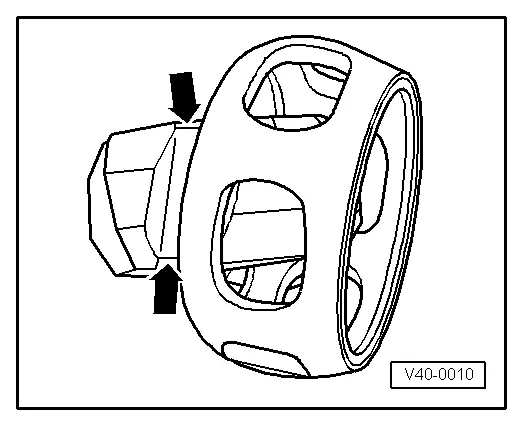
- Swivel the ball hub and ball bearing cage.
- Remove the joint in the direction of the -arrow-.
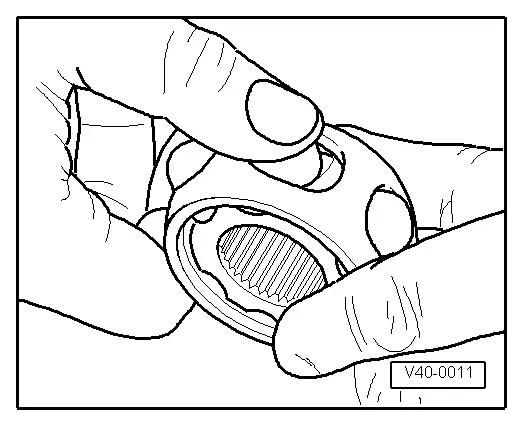
- Remove the balls from the cage.
- Flip out ball hub from ball cage via running path of ball -arrows-.
- Check joint piece, ball hub, ball cage and balls for small broken off depressions (pitting build-up) and chafing.
 Note
Note
Excessive backlash in joint will be noticed as a knock during load changes. Joint must be replaced in such cases. Flattening and running marks of balls are no reason to replace joint.
Assembling
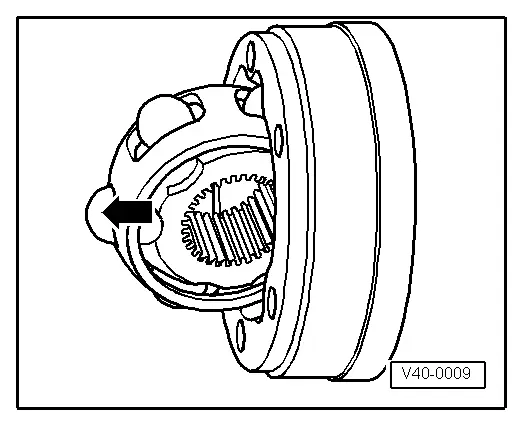
- Insert ball hub into ball cage via two chamfers. The installation position is at random. Press balls into cage.
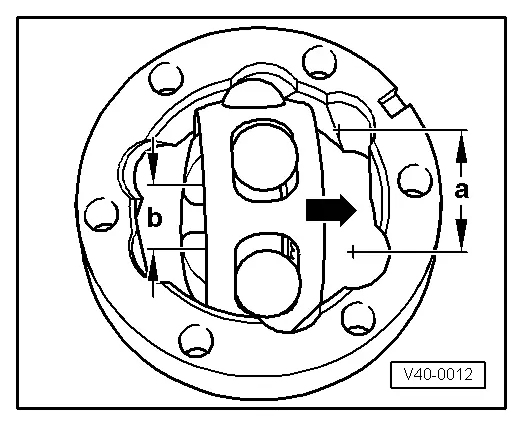
- Insert hub with cage and balls upright into joint piece.
- When inserting, make sure that in each case the wide gap -a- at joint piece contacts narrow gap -b- at hub after swinging in.
- Chamfer on inner diameter of wheel hub (splines) must face toward drive axle.
- Swing in ball hub, to do so swing out hub far enough from cage -arrows- so that the balls have the distance of the running paths.
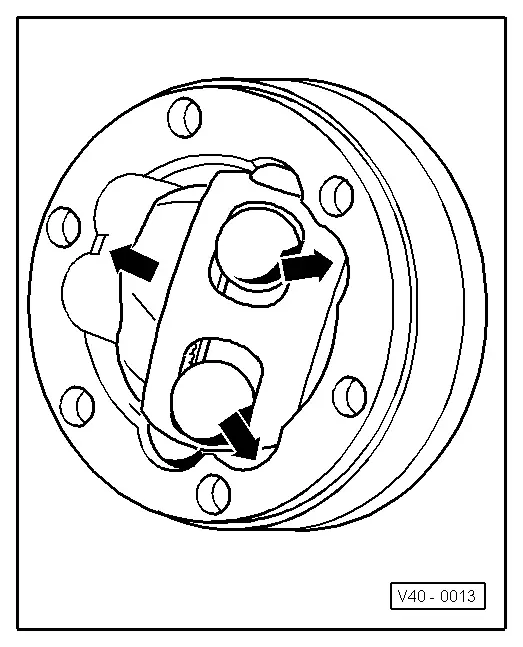
- Swing in hub with balls by pressing forcefully onto cage -arrow-.
Check the CV joint for function.
CV joint is properly assembled, if ball hub can be slid back and forth by hand over whole compensation length.
- Press grease into joint body.
Grease Capacities and Types, Drive Axle with 100 mm Inner CV Joint.
Grease Capacities and Types, Drive Axle with 107 mm Inner CV Joint.