Audi Q5: Center Console, Removing and Installing
Removing
- Versions with insert: Remove the center console insert. Refer to → Chapter "Center Console Insert, Removing and Installing".
- Versions with multimedia system control head: Multimedia System Control Head -E380- removing Refer to → Communication; Rep. Gr.91; Infotainment System; Multimedia System Control Head E380, Removing and Installing.
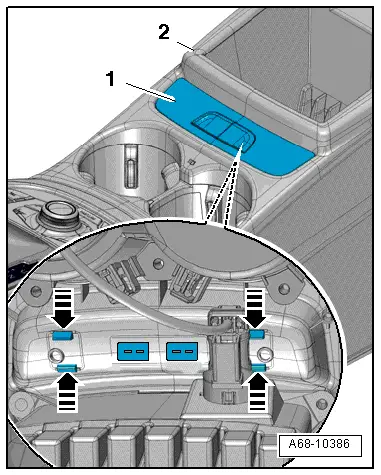
- Versions with a 12 V socket: Disconnect the connector -2-.
- Remove the bolts -1- and -3-.
- Vehicles with a front center armrest: Remove the front center armrest. Refer to → Chapter "Front Center Armrest, Removing and Installing".
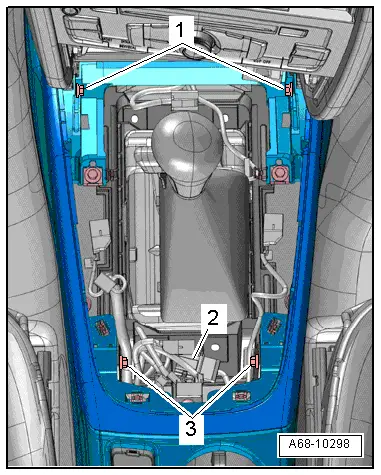
- Vehicles without a front center armrest: Remove the rear center console trim. Refer to → Chapter "Center Console Rear Trim without Center Armrest, Removing and Installing" and nuts -1-.
- Disconnect the AUX connector, if applicable.
- Versions with a telephone/cellular phone: Disconnect the connectors.
- Lift the center console and remove it back out of the instrument panel and over the selector lever/shift lever.
Installing
Install in reverse order of removal. Note the following:
- Make sure the center console is flush with the instrument panel.
Cupholder, Removing and Installing
Cupholder, Removing and Installing
Removing
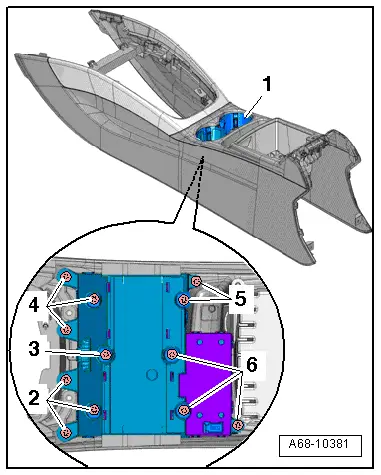
- Remove the center console. Refer to → Chapter "Center Console, Removing and Installing".
- Rotate center console.
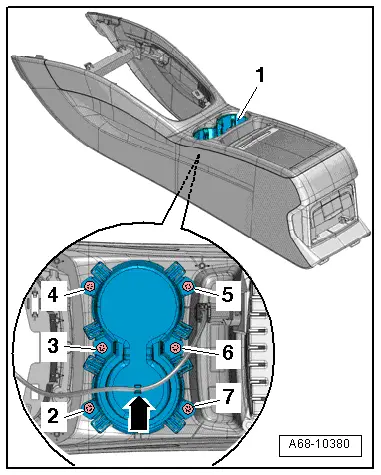
- Remove the bolts -2 to 7-.
- Disengage the wire -arrow- and remove the cupholder -1-.
Installing
Install in reverse order of removal.
Cupholder with Heating And Cooling Element -Z105-, Removing and Installing
Removing
- Remove the center console. Refer to → Chapter "Center Console, Removing and Installing".
- Remove the vents on the left and right sides of the center console. Refer to → Chapter "Air Vent Grille, Removing and Installing".
- Rotate center console.
- Remove the bolts -2 through 6-.
- Disconnect the connector and remove the Cupholder with Heating and Cooling Element -Z105--item 1-.
Installing
Install in reverse order of removal.
Center Console Rear Storage Compartment, Removing and Installing
Special tools and workshop equipment required
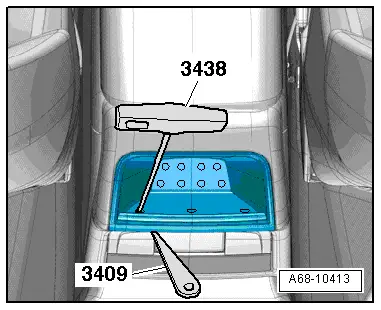
- Trim Removal Wedge -3409-
- T-Handle Hook -3438-
Removing
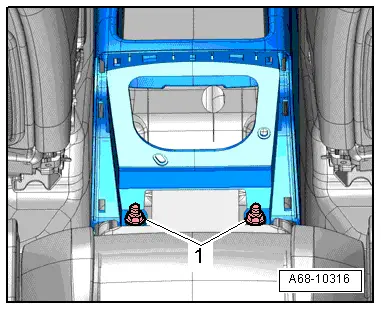
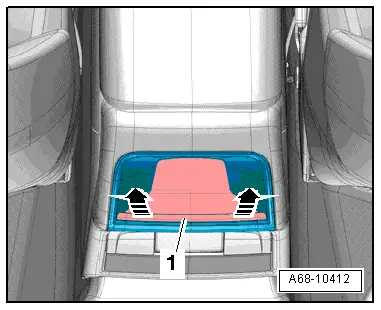
- Carefully remove lining mat -1- from the retaining studs -arrows-.
- Mount the T-Handle Hook -3438- into the lower holes in the storage compartment and at the same time push the Trim Removal Wedge -3409- into the gap between the storage compartment and the center console.
- Disengage the storage compartment all the way around and remove it.
Installing
- Insert the lower storage compartment, tilt it upward and press it into the installation opening as far as the stop.
Center Console Bracket, Removing and Installing
Removing
- Remove the center console. Refer to → Chapter "Center Console, Removing and Installing".
- Versions with an access/start authorization antenna: Refer to Access/Start System Antenna 1 in Vehicle Interior -R138-. Refer to → Electrical Equipment; Rep. Gr.94; Access/Start Authorization; Access/Start System Antenna 1 in Vehicle Interior R138, Removing and Installing.
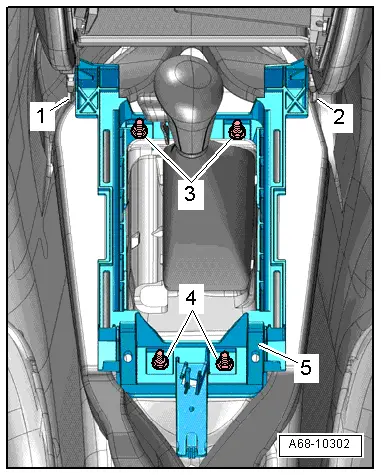
- Remove the nuts -3- and -4-.
- Disengage the bracket -5- at the tabs -1- and -2- and remove.
Installing
Install in reverse order of removal.
Coat Hooks, Removing and Installing
Removing
- Push the coat hook -2- into the mount -1--arrow A-.
- Turn the coat hook counter-clockwise -arrow B- and remove.
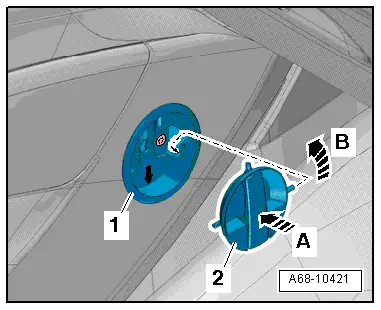
- Remove the screws -4- and remove the coat hook mount -1-.
- Carefully pull the center console -3- on the side from the center tunnel wall and remove the counterholder -2- on the back side of the center console.
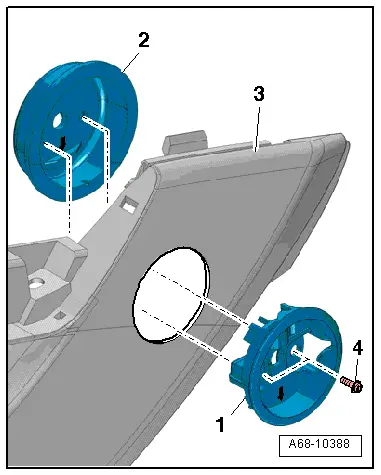
Installing
Install in reverse order of removal. Note the following:
- Align the mount and coat hook counterholder in the center console.
- The arrow points downward.
Switch Trim, Removing and Installing
Removing
- Remove the center console. Refer to → Chapter "Center Console, Removing and Installing".
- Carefully compress the clamps -arrows- and remove the trim -1- from the center console -2-.
- Disconnect the connectors and remove the trim.
Installing
Install in reverse order of removal.