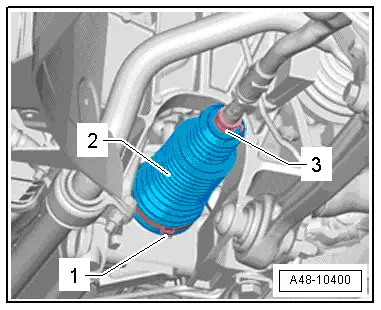
Audi Q5: Boot, Removing and Installing, Hydraulic Power Steering Gear
Special tools and workshop equipment required
- Torque Wrench 1331 5-50Nm -VAG1331-
- Torque Wrench 1332 40-200Nm -VAG1332-
- Hose Clip Pliers -VAG1921-
- Locking Pliers -VAS6199-
- Puller - Ball Joint -T40010A-
- Torque Wrench 1332 Insert - Ring Wrench - 18mm -VAG1332/10-
- Torque Wrench 1332 Insert - Ring Wrench - 21mm -VAG1332/7-
Removing
 Note
Note
If the bellow is faulty, moisture and dirt will penetrate into steering gear. There must be a noticeable grease film present on steering rack in area of splines. If grease film is not present, steering gear must be replaced. Steering gear must also be replaced if there is corrosion or steering gear is damaged or worn out.
- Place the vehicle on a hoist.
- Remove the wheel.
- Turn steering wheel into straight ahead position.
- Remove the noise insulation. Refer to → Body Exterior; Rep. Gr.66; Noise Insulation.
- Clean the power steering gear and subframe in the boot area.
 Caution
While doing this, no dirt must enter the steering gear through the faulty boot.
- Remove the nut -1- from the tie rod end joint pin -2- until it is flush with the joint pin threads. Counterhold when loosening if necessary.
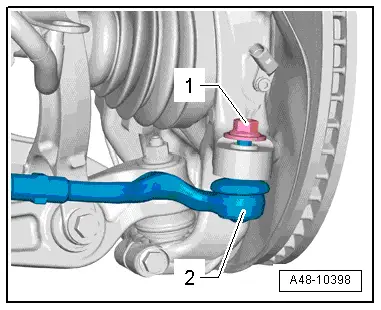
To protect thread, screw nut on pin a few turns.
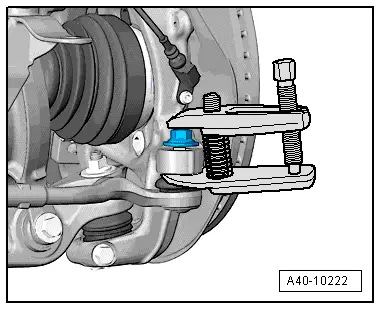
- Remove the tie rod end from the wheel bearing housing using the Puller - Ball Joint -T40010A-. Remove the nut.
 Note
Note
Make sure that both puller lever arms are parallel to each other when using greatest force, adjust if necessary.
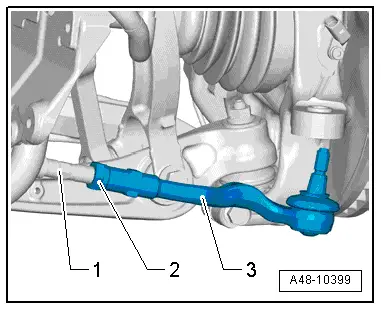
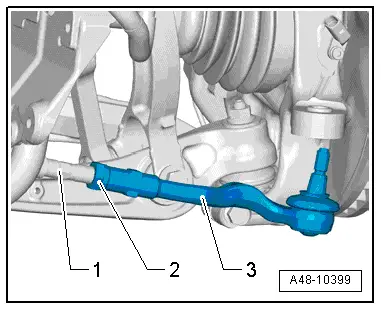
- Mark the position of the nut -2- on the tie rod -1- for installation later.
- Counterhold the tie rod end -3- and loosen the nut -2-.
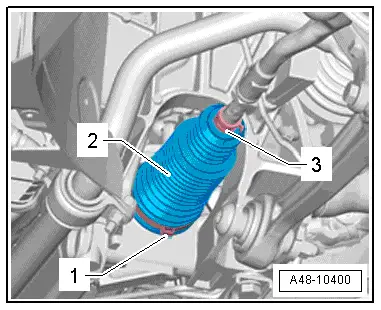
- Open the spring clamp -3- with the Hose Clip Pliers -VAG1921- and remove it.
- Remove the clamp -1- and remove the boot -2- from the power steering gear.
- Remove the tie rod end -3- and nut -2- from the tie rod -1-.
- Pull off the boot with spring clamp from tie rod.
 Note
Note
- If corrosion, damage, wear-out or first signs of soiling on steering rack can be seen, complete steering gear must be replaced.
- If no grease film is visible on steering rack, steering gear must also be replaced completely.
Installing
Before installing, coat the steering rack with the grease supplied in the repair set.
 Caution
Do not use other grease under any circumstances.
For this purpose, turn steering to stop toward both sides in succession.
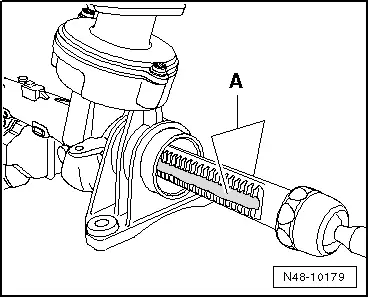
For clearer illustration, steering gear has been removed in the illustration.
- Grease the steering rack on the toothed side -A- and on the thrust piece side with grease.
- Turn steering wheel into straight ahead position.
- Guide new clamp and boot onto tie rod.
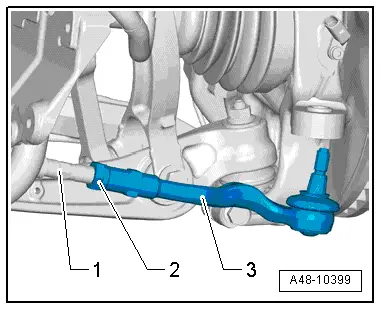
- Install the nut -1- and tie rod -3- up to the marking applied during removal.
- Tighten the nut -2- to the specification. Counterhold the tie rod end -3-.
The boot/power steering gear sealing surface must be free of grease when installing.
- Slide the boot onto the steering gear housing with a new clamp.
- Make sure the boot is seated correctly on the power steering gear.
- The boot must fit in the groove and on the contour of the power steering gear.
Clamping Sleeves, Installing
Make sure that dimension -A- of 5.7 mm maximum is observed. Dimension -A- must never be greater than 5.7 mm, otherwise there may be problems with the seal.
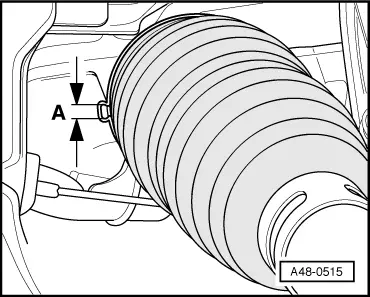
- Tighten the clamp -1- using the Locking Pliers -VAS6199-.
- Secure the spring clamp -3- on the boot -2- using the Hose Clip Pliers -VAG1921-.
Install in reverse order of removal.
- An axle alignment may be required. Refer to → Chapter "Evaluating Need for Axle Alignment".
