Audi Q5: Adaptive light
Applies to vehicles: with adaptive light
When driving around bends, the relevant area of the road is better illuminated.
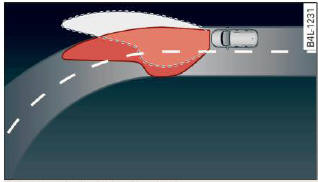
Fig. 48 Adaptive light when driving
Switching on adaptive light
- Turn the light switch to AUTO > fig. 46.
The adaptive light system is a combination of the dynamic and the static cornering lights. With the lights switched on, the dynamic cornering light adapts to driving on curves. This is dependent upon the vehicle speed and steering angle. This provides better lighting through the curve. The system operates in a speed range from approximately 6 mph (10 km/h) to 68 mph (110 km/h).
The static cornering light switches on at speeds of up to approximately 25 mph (40 km/h) when a certain steering wheel angle is reached or when a turn signal is activated. The area to the side of the vehicle is illuminated better when turning.
Emergency flashers
The emergency flashers makes other motorists aware that you or your vehicle are in an emergency situation.
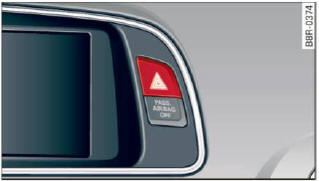
Fig. 49 Emergency flasher switch
- Press the switch
 > fig. 49 to turn the emergency
flashers on or off.
> fig. 49 to turn the emergency
flashers on or off.
When the emergency flashers are on, all four
turn signals blink at the same time. The turn signal
indicator lights
 in the instrument cluster,
as well as the light in the emergency flasher
switch
blink Likewise. The emergency flashers
also work when the ignition is turned off.
in the instrument cluster,
as well as the light in the emergency flasher
switch
blink Likewise. The emergency flashers
also work when the ignition is turned off.
The emergency flashers will turn on automatically if you are in an accident where the airbag has deployed.
Tips
You should turn on the emergency flashers when:
- you are the last vehicle standing in a traffic jam so that any other vehicles coming can see you, or when
- your vehicle has broken down or you are in an emergency situation, or when
- your vehicle is being towed by a tow truck or if you are towing another vehicle behind you.

