Audi Q5: Roof Trim Panels
Roof Trim Panel Component Location Overview
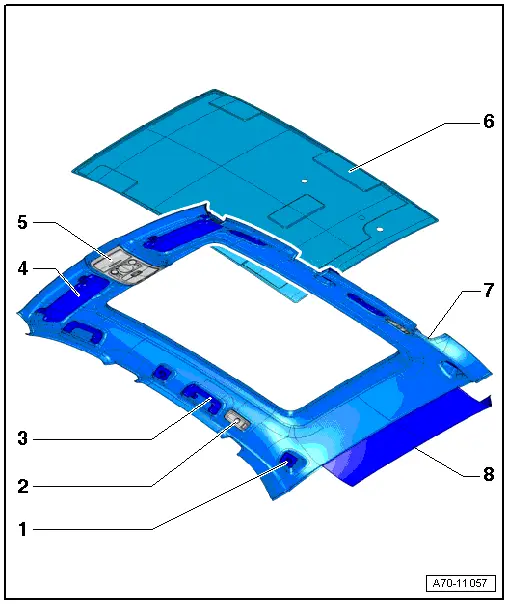
1 - Mount
- For the screen separator wall
- Overview. Refer to → Chapter "Overview - Screen Separator".
2 - Interior Light/Rear Reading Light
- Removing and installing. Refer to → Electrical Equipment; Rep. Gr.96; Controls; Rear Interior/Reading Lamp, Removing and Installing.
3 - Roof Grab Handle
- Removing and installing. Refer to → Chapter "Roof Grab Handle, Removing and Installing".
4 - Sun Visor
- Overview. Refer to → Chapter "Overview - Sun Visors".
5 - Interior/Front Reading Lamp
- Removing and installing. Refer to → Electrical Equipment; Rep. Gr.96; Controls; Front Interior Lamp/Reading Lamp, Removing and Installing.
6 - Roof Reinforcement
- Vehicles without a sunroof
- For attaching to the body, refer to → Chapter "Roof Reinforcement, Attaching to Body".
7 - Headliner
Equipment levels
- Overview. Refer to → Chapter "Overview - Headliner".
 Caution
- The headliner bends easily.
- Replace the headliner if it is bent.
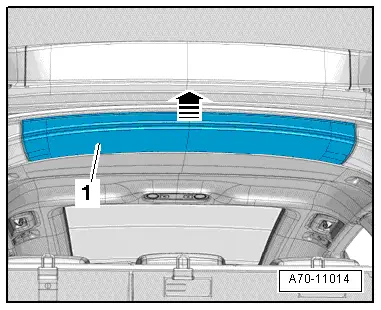
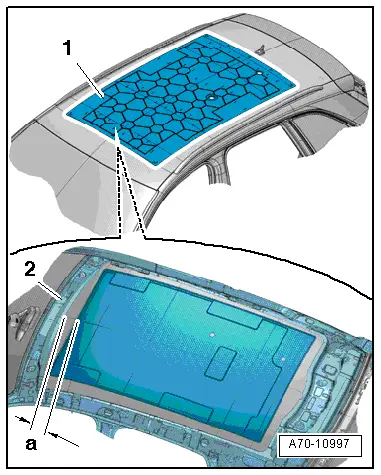
8 - Roof Panel Trim
- Overview. Refer to → Chapter "Roof End Strip Assembly Overview".
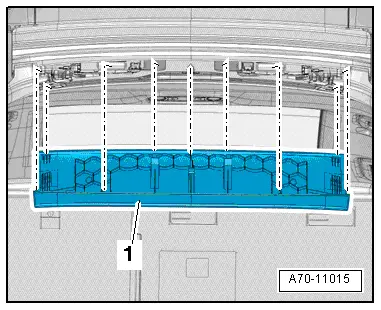
Roof End Strip Assembly Overview
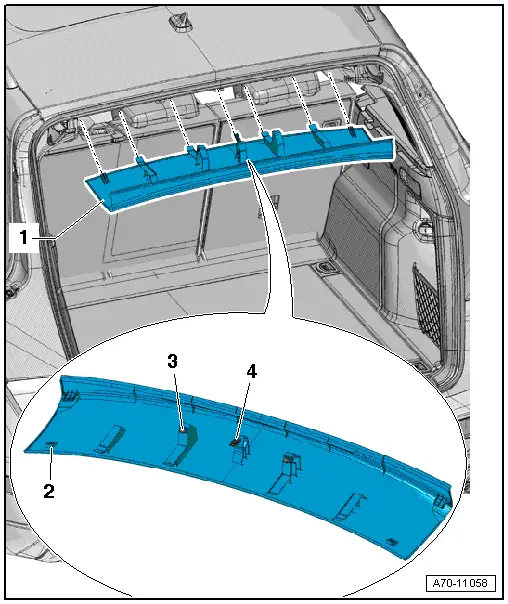
1 - Roof Panel Trim
- Removing and installing. Refer to → Chapter "Roof End Strip, Removing and Installing".
2 - Clip
- Push onto the D-pillar trim
3 - Bracket
- Quantity: 2
- Insert in the trim panel
- Replace if damaged or deformed
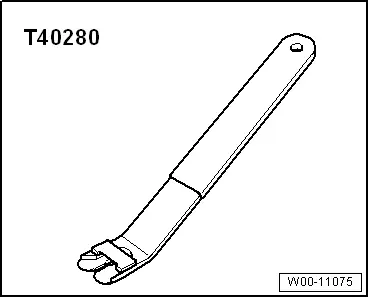
- Remove the clips that are still in the mounting points on the body using the Omega Clip Tool -T40280-.
4 - Centering Pins
Overview - Headliner
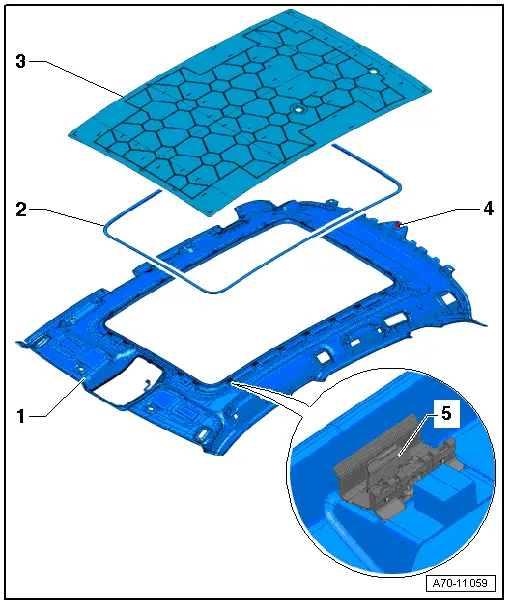
1 - Headliner
Equipment levels
- Removing and installing. Refer to → Chapter "Headliner, Removing and Installing".
 Caution
- The headliner bends easily.
- Replace the headliner if it is bent.
2 - Cover Frame
- Vehicles with sunroof
- The marking points to the rear of the vehicle
3 - Roof Reinforcement
- Vehicles without a sunroof
- For attaching to the body, refer to → Chapter "Roof Reinforcement, Attaching to Body".
4 - Centering Clip
5 - Bracket
- Vehicles with sunroof
- Quantity: 23
- Insert in the headliner
- Replace if damaged or deformed
- Release
Roof End Strip, Removing and Installing
Special tools and workshop equipment required
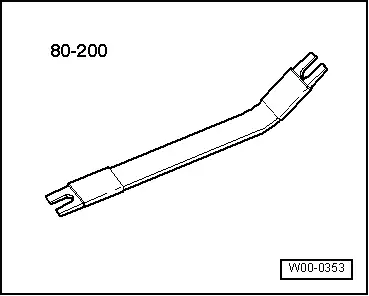
- Pry Lever -80 - 200-
- Omega Clip Tool -T40280-, is needed to remove any clips are that still inside the body.
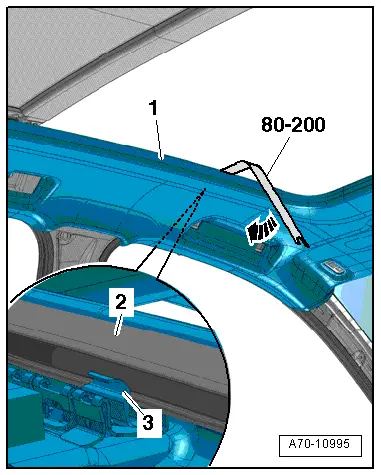
Removing
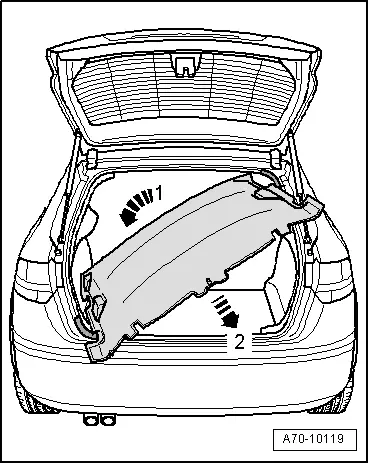
- Carefully unclip the rear roof panel trim -1- in the center off the roof frame using the Pry Lever -80 - 200--arrow-.
Installing
 Note
Note
- If the trim clamps remain in the body mounting points, remove them and insert them in the trim.
- Check clamps for damage or deformation, replace if necessary.
- Mount the rear roof panel trim -1- so that the hooks touch the D-pillar trim.
- Position the rear roof panel trim on the pins, then press on it until the clips audibly engage.
Headliner, Removing and Installing
Special tools and workshop equipment required
- Pry Lever -80 - 200-
Removing
 WARNING
Follow all Safety Precautions when working with pyrotechnic components. Refer to → Chapter "Pyrotechnic Components Safety Precautions".
- Fold the backrests forward.
- Adjust the front seat backrest to a 45º angle
- Remove the A-pillar upper trim. Refer to → Chapter "A-Pillar Trim Panel, Removing and Installing".
- Remove the upper B-pillar trim panel. Refer to → Chapter "B-Pillar Trim Panel, Removing and Installing, Upper B-Pillar Trim Panel".
- Remove the C-pillar trim panel. Refer to → Chapter "C-Pillar Trim Panel, Removing and Installing".
- Remove the rear roof panel trim. Refer to → Chapter "Roof End Strip, Removing and Installing".
- Remove the D-pillar trim. Refer to → Chapter "D-Pillar Trim Panel, Removing and Installing".
- Remove the mounts for the partition net. Refer to → Chapter "Screen Separator Bracket, Removing and Installing".
- Remove the sun visors. Refer to → Chapter "Sun Visor, Removing and Installing".
- Remove the front interior lamp/reading lamp. Refer to → Electrical Equipment; Rep. Gr.96; Controls; Front Interior Lamp/Reading Lamp, Removing and Installing.
- Remove the sun visor center support. Refer to → Chapter "Sun Visor Center Support, Removing and Installing".
- Remove the roof grab handle. Refer to → Chapter "Roof Grab Handle, Removing and Installing".
Versions Equipped with a Sunroof:
- Open the sunroof -1- all the way.
- Open the sun shade -2- about 2/3.
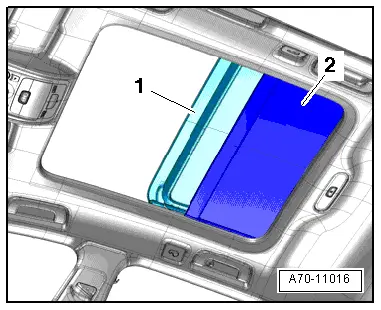
- Clean the Pry Lever -80 - 200-, to avoid soiling headliner.
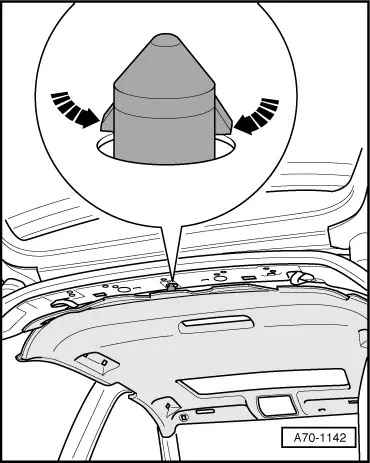
- Let the Pry Lever -80 - 200- slide along between the sunroof opening cover frame -2- and the headliner -1- until it touches one of the clips -3-.
- Release the cover frame form the clips one after the other using the Pry Lever -80 - 200--arrow-, as illustrated.
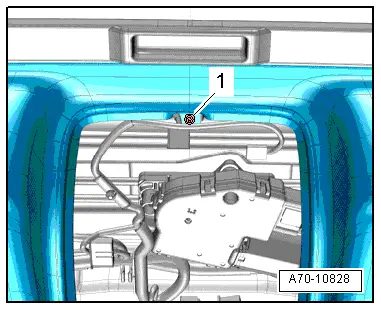
- Remove the bolt -1- in the front interior/reading light roof opening.
Continuation for all Vehicles:
 Caution
- The headliner bends easily.
- Replace the headliner if it is bent.
 Note
Note
Two technicians are needed to loosen the last connections and to remove the headliner.
- Release the clips -arrows- on the rear centering clip with a small screwdriver.
- Lower the headliner on the left side of the vehicle -arrow 1-.
- Remove the headliner through the opening for the rear lid -arrow 2-.
Installing
 Note
Note
- If the headliner clamps remain in the body mounting points, remove them and insert them in the headliner.
- Check clamps for damage or deformation, replace if necessary.
Install in reverse order of removal. Note the following:
 WARNING
Follow all Safety Precautions when working with pyrotechnic components. Refer to → Chapter "Pyrotechnic Components Safety Precautions".
- Align the headliner and press on the clips on the cover frame for the sunroof opening until they engage audibly.
Roof Reinforcement, Attaching to Body
Special tools and workshop equipment required
- 1K Assembly Adhesive -D 190 MKD A3-
Procedure
- Remove the headliner. Refer to → Chapter "Headliner, Removing and Installing".
- Apply a bead of adhesive -arrow- onto the roof reinforcement as illustrated.
- Distance between the adhesive beads -a- = approximately 90 mm.
- Distance of the outer bead of adhesive to the edge of the roof reinforcement, dimension -b- = approximately 20 mm.
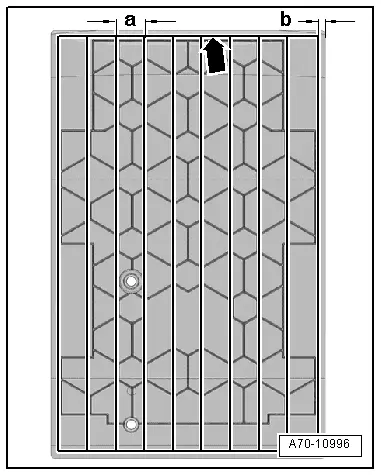
- Mount the roof reinforcement -1- centered to outer sides and at distance -a- to the bow -2- of the front edge of the roof.
- Dimension -a- = approximately 100 mm.
- Press the roof reinforcement onto the roof from inside.
- Install the headliner. Refer to → Chapter "Headliner, Removing and Installing".
Special Tools
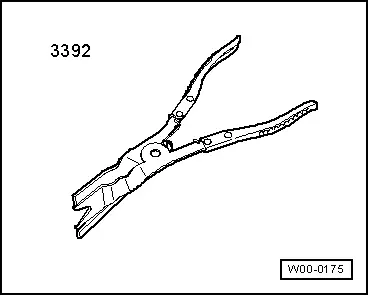
- Door Trim Pliers -3392-
- Removal Wedge -3409-

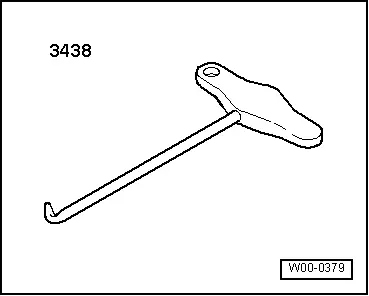
- T-Handle Hook -3438-
- Pry Lever -80 - 200-
- Removal Tool -T40280-
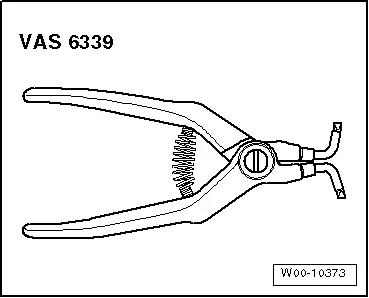
- Ignition Lock Pliers -VAS6339-